Showing posts with label quickutz. Show all posts

September 29, 2014

Coffee Lovers Blog Hop

Print

Funny thing is, I don’t love coffee at all! But I love my coffee stamps so I think that qualifies! :)

Click the graphic above to visit the blog hop start. Isn’t it a pretty graphic? I love it!

coffee lovers blog hop

I sure hope the colours are accurate on this photo. I had trouble with that on my last post even though I edited it as usual. I used a background stamp I’ve had for so long I have no idea who manufactured it. I embossed it with brown EP on water colour paper and then added various inks to ‘watercolour’ it. Then I added the embellishment cluster which includes some cheese cloth.

I couldn’t decide what sort of sentiment to use but I finally settled on a thank you. I intend to give this to my girlfriend who is very generous with babysitting when I ask her on a coffee date to thank her.

Enjoy the blog hop! Rebecca

RECIPE
I’m exhausted so I’ll add it later.

January 25, 2014

Spring has Arrived for Unscripted Sketches #241

Ok, I know, I am jumping the gun in a huge way. Most of us are locked in the grip of winter and struggling through snow and freezing temperatures. So I felt a pop of spring was a necessity to cheer me and everyone else up.

apring has arrived 1

I really stretched the sketch this week. But it was fun to see the branches work as the grey strips on the sketch. Ok, so I know the ‘Spring’ looks crooked but I SWEAR it isn’t! I measured it twice! I think it’s the slant of the ‘r’, then the fact that the top line of the ‘n’ is low and the bottom of it dips down combined with ‘g’ tail dipping down too.

spring has arrived 2

The centers of the flowers are made with a tiny dot of Viva paper pen. The branches are held with glue only at the thicker part of the branch so the thinner parts with the flowers sit off the paper a bit giving the, dimension. I cut some small bits off the upper branch and moved one smaller branch and relocated it to make it look different from the bottom branch so more  realistic.

241

I’d love to see what you would do with this sketch? Do you play it clean and simple? Jazz it up? Stick right to the sketch? or go outside the box? Please be sure to join us at Unscripted Sketches this week! Thanks so much to all of you who come back and play often or even every week!

Enjoy, Rebecca

RECIPE
Paper:
kraft CS-PTI, DP-WRMK Spring, white CS-PTI
Accessories: cloud dies-PTI (airbrushing), alpha dies-Quickutz, branch die-Memory box, flower dies-Sizzix yarrow

February 25, 2013

Monogrammed Notecard Set for Papertrey Ink Blog Hop

PTI blog hop logo

This month’s challenge was to create with monograms. Not something I do a lot of but isn’t that why they call it a ‘challenge’ and not an ‘easy’!? hee hee!

monogram notecards

I decided to make myself a pretty set of monogrammed notecards. I never have a decent thing to write a note on to the teacher despite having literally reams worth of GORGEOUS paper! Absolutely disgusting! So I was happy to finally have something nice to write on.

monogram notecards4a

I plan to make a few more like these and a few more with just stamping and the monogram for when I need more space plus they will take less time to make. I may even stamp the monogram instead of die cutting it saving even more time. 4 was plenty for now considering I’ve just finished making 230 wedding favours for my sister’s wedding! Kinda sick of multiples for a while. I’m going to have a tutorial soon with tips on die cutting and stamping huge quantities of items! Stay tuned or check back if you are new to my blog.
monogram notecards3

Many of you may be new today so you don’t know me. But I am, in the words of Tim Gunn (Project Runway), a “make it work” type of person. So I rarely throw a card in the trash. An element or two maybe but even that is rare. So when a comedy of errors befell these cards, I made them work! First, my stupid cutter’s blade was dull so my papers had whiskers. So I trimmed them off with a scissors. Then I was adding the monograms and using a fine tipped bottle of glue. It virtually never clogs so I just kept adding more and more pressure to get the darn glue out until… you guessed it, a gigantic blob of glue landed on my notecard! Fortunately, it wasn’t the kind that sinks down into the paper so I used an adhesive eraser once it was dry!

monogram notecards2

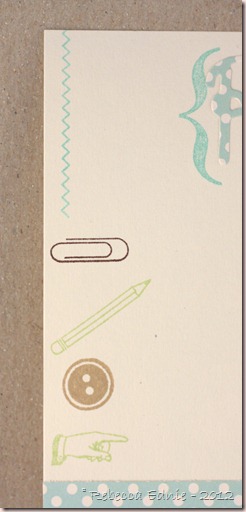
I laid out all my stamps along the left edge of the paper to arrange them. When the hand touched my acrylic block, the pencil too came for a ride even though I had moved it out of the way, just not far enough. I guess I inked the hand on the edge of the pad and didn’t ink the pencil so once I checked how it looked the first time, something I do when stamping multiples, especially with a stamp I’ve not used before, I went ahead and stamped the rest. I guess I hit the ink pad differently the other times because the pencil partially stamped and not in the colour or place I wanted it to. grrr… After saying bad things under my breath I tried stamping over. Nope, the lines were so thin, I couldn’t see them through my block and yes, it is clean! The solid end lined up.

So, is this worth trashing, especially when it’s the last step? IMHO, nope! Seriously, its a note to the teacher. Does she care if the pencil isn’t lined up? Nope! So think about that the next time something is headed for the round file! Does it matter that much? If it is headed to CHA, then yes, save the flubbed one for grandma and redo it but otherwise, take a deep breath and move on! I have to work very hard to not obsess and take myself too seriously! My kids need me and I can’t spend all day in my craft room redoing things and it isn’t healthy. So make it work ladies!

I hope you are enjoying the hop! If you like what you’ve seen or you don’t want to forget to come back for my assembly line die cutting and stamping tutorial or to see my wedding favours, be sure to subscribe by RSS or email subscription. They are both on my left sidebar. If you read this far, you are amazing and I thank you for visiting. Have a great day!

Enjoy, Rebecca

RECIPE
Stamps:
Button Boutique, Take Note-PTI
Ink: Aqua Mist, Spring Moss, Kraft, Chocolate
Paper: DP-PTI, ivory-cheap stuff
Accessories: chevron die-PTI, alpha die-Quickutz

November 30, 2012

Vintage Parfum

I am in a challenge on Swap-Bot to use one stamp three different ways.
This was one of my projects. I am entering this in Unscripted Sketches 186 and Simon Says Stamp challenge ‘Anything Goes’ as well.
vintage violette parfum

Sorry the formatting is messed up. I sent this via email and when I edited it in Live Writer, it seems a bit odd. The flowers are coloured with some Copics I rarely use but they look so pretty with these vintage colours. V91 and 95. I wonder if they make another V90 something… Incidentally, the stamp I used was the bottle and it conveniently has several different things you can stamp within the label! This one is definitely my favourite.

unscripted sk-186

I dyed the seam binding myself. I added several drops of blush reinker and a tiny, less than a drop, amount of Antique Linen to some water. It’s hard to see but the ribbon is unevenly dyed which makes it look old and stained. TIP: To achieve that effect, I added the blush reinker directly to the water but smeared the Antique Linen directly to the bag. I smushed the ribbon in the water and squeezed it dry. Then I dragged the wet ribbon into and through the AL. Means the ribbon gets unevenly dipped in the AL and a stained look. Perfect!

vintage violette parfum2

Isn’t this bottle so pretty? I stamped it on a solid coloured paper from the pack. Then I shaded both the label and the bottle but subtly. I twisted the ribbon that goes around the card because I didn’t like how much it covered the lace. I like the look!

vintage violette parfum3

I’m also entering this in the Shabby Tea Room Challenge to use Neutrals as well as twine or ribbon and a sentiment. Mine is little but it is there, on the tag. Click on the photo to visit the challenge post.

TSTR _142

Enjoy, Rebecca

RECIPE
Stamps:
Graphic 45 Olde Curiosity Shoppe
Ink: chocolate-Papertrey Ink, old Paper, frayed burlap distress. perfect plum-SU! (envelope)
Paper: true thyme CS-SU!, ivory CS-scrap, DP-Capella Basic Grey
Accessories: Copics, tag die-Quickutz, HugSnug Seam Binding, blush reinker-SU!, Antique Linen reinker, vintage MOP button, lace-stash, foam dots-Jody Morrow, twine-PTI

September 30, 2012

Last Minute! September SFYTT–Funky Thank You

My sister’s best friend and her family had an engagement party (yes, another one) for her last night and I wanted to make a thank you card. Since I needed to get my butt in gear and make a card for SFYTT for this month, I combined them! I try not to wait to make thank you cards or I forget to send them.

sfytt sept funky

This one is for my sister’s friend. I’ll be blogging the one for her mom and dad shortly. This sketch has lots of possibilities, I went C&S for this but there are lots of fun things I could do shabby chic-ish.

sfytt sept funky2

To add a bit of character, I pierced the vellum panels. My husband just asked me why my ‘fabric is so blurry’. Uh, that’s vellum on paper dear… gee whiz, that’s a man for ya! I explained I used the vellum panels because I didn’t have another paper I liked that matched. He still isn’t convinced.

sfytt sept2012sketch

Click on the sketch to visit the challenge blog.

Enjoy, Rebecca

RECIPE
Paper:
DP-Basic Grey Offbeat, black, orange CS-SU!, vellum-stash
Accessories: Piecing guide-SU!, alpha dies-Quickutz

June 20, 2012

Puppy Love Wire Photo Holder

This was one of two doggie-themed gifts I mafe for my mom. She recently lost her dog who was 14.5 years old and she was devastated. And since she is hard to buy for, I pretty much have to make something to be sure she doesn’t already have it!

puppy love photo frame

This originally was a nasty yellow colour and I can’t imagine why anyone, even a dollar store would use it. I sanded it so the paint would grab and added two coats of acrylic paint. Then I covered it in Rock Candy Crackle Paint. The doggie bone embellishment is a die cut from MFT which I covered in Glossy Accents.

puppy love photo frame closeup

The scalloped circle is covered in Max and Whiskers paper and sealed. Then I added the banner; just the letters are covered in Glossy Accents.

Enjoy, Rebecca

RECIPE
Stamps:
MFT
Ink: Walnut stain, Antique Linen, Vintage Photo Distress ink
Paper: Max and Whiskers-Basic Grey, chocolate, kraft CS-SU!
Accessories: copper brad, charm, paw brads-stash, woof button-Jesse James, Glossy Accents, mini scalloped punch-EK Success, Quickutz alphabet, Technique Tuesday scalloped chipboard circle, CTMH files, striped button twine-PTI, love wire photo holder-Dollarama

May 24, 2012

Butterfly Thank You Card

I pulled out a bunch of paper packs to show my son so I could pick a style for his teacher thank you card. I figure teachers are people too and probably get tired of teacher-y themed cards. He has no idea which style best suited her but chose 7 Gypsies papers for this card. He thought she would like the butterflies.

butterfly teacher thanks

Not much to explain about this one. Lots of inking and distressing. I used Unscripted Sketches #159. Click on the sketch to visit the challenge.

unscriptedsketches159

Enjoy, Rebecca

RECIPE
Stamp:
PTI Mixed Messages
Ink: Memento black, Antique Linen, Vintage Photo Distress, kraft, vanilla, black CS-SU!
Paper: Graphic 45 Curiosity Shoppe, 7 Gypsies (butterfly panel)
Accessories: vintage buttons, ribbon-stash, tag die-Quickutz, gold string-SU!, foam dots- Jody Morrow,

April 05, 2011

Daisy Hat Card for Doodle Pantry

Wow, it is SPRING already, well technically anyways. Our weather hasn’t been great but my bulbs have started poking their green little heads up and the sap is running so we get pancakes with fresh syrup soon. I can’t believe it is already April 5 and time for another fabulous release from Doodle Pantry!

hat smile card wm

Isn’t this hat so springy and pretty!?! Click on the photo for a better look at my colouring. In case you don’t colour, this image is available PRE-COLOURED too! How nifty is that! Don’t forget, Doodle Pantry has a challenge this week too! You must use a Doodle Pantry image for the challenge and you can win a Free Image! Don’t have any images yet? Just Grab a Freebie! There are 10 available!

hat smile card closeup

I normally link you up to the image in the store but it isn’t up yet so you will have to wait for the release. Be sure to check out the DP blog for all of the Design Team’s AMAZING latest cards based on the FABULOUS released images.

I used the latest CPS sketch; I rotated it 90 degrees then mirrored it. I really liked how much space was left at the bottom for the punched edge, I all too often add a punched edge as an after thought or at least as a middle thought and don’t leave space for this gorgeous large punch. This time I started with the punch!

sketch109

Click on the sketch to link to the CPS blog.

Enjoy, Rebecca

RECIPE
Image:
Floral Hats-Doodle Pantry
Stamps: PTI
Ink: celery-SU!
Paper: saffron CS-SU!, DP-American Crafts, white CS-Taylored Expressions
Accessories: yellow ribbon-Masterstroke, pearls-Dollarama, green striped-May Arts, button, twine-PTI, MS punch, Copics Y21, Y31, YG 63, G21, C1, E21,31,33,50, 00, foam dots-Jody Morrow, Labels 8 Nestabilities, tag die Quickutz

October 16, 2010

2S4Y Pink Peonies

I love using sketches to create! Better yet, this week, the gals at 2S4Y are looking 2! design team members! I would love that ‘job’! More like a privilege! Pick me!

2s4y entry peo

It is pretty easy to figure out. One little interesting note. If you click on the picture for a close up, you can see that I stitched around the perimeter of the DP. One row has thread but the other row is just piercing. Wonder why? I goofed up and sewed using the edge of the card to line up down one side but when I got to the corner, I goofed and followed the edge of the DP. So I removed the thread in the incorrect area and continued sewing correctly. Then to disguise the goofed up holes, I continued ‘sewing’ without thread the rest of the way. Make a mistake, figure out how to cover it up, I rarely ever throw out a card.

Enjoy, Rebecca

RECIPE
Stamps:
flower-JustRite, sentiment-SU!
Ink: Vintage Velvet, Antique Linen-Distress Ink, Memento black
Paper: DP-October Afternoon, white CS-X-Press It, banana CS-SU!, vintage music paper
Accessories: pearls-Kaisercraft, seam binding tape-Etsy, Copics-RV00, R81,83,85,89, G24,28, YR31 (airbrushed), Nestabilities circles, lacy circles, string-Dollarama, tag die-Quickutz, sewing machine, thread-Mettler

August 24, 2010

Butterfly Challenge Card

This card is for the Embellish Magazine colour challenge of kraft, sea foam, peach and cream with a quirky, cute style and Unscripted Sketches Challenge #69 with a piggy back challenge  to use anything except the typical punched flower!

peach aqua kraft cream butterfly card 
Unscripted69
Embellish it sea foam kraft peach aquaChallenge
I can’t believe I played in both challenges and neither have expired yet! I am always playing challenges and forgetting to enter my link in the challenge. Everything is pretty easy to figure out but I did have an interesting way of doing the clouds.

I wanted the clouds to puff up but still appear to come from behind the cut outs. At the same time, I didn’t want the paper to be puffy around the edges. So I cut the clouds using the die and I cut the shape out of the paper also. Then I stretched the fluffy cloud stuff, natural cotton quilt batting, so it went just under the edges of the paper and I put score tape all around the die cuts to they would stick down well. I got just the look I was going for.

Enjoy, Rebecca

RECIPE
Stamp:
Unity
Ink: chocolate chip-SU!
Paper: DP-Joy Ride Cosmo Cricket, kraft CS-CDS, Ivory, celery CS-SU! 
Accessories: corner rounder-WRMK, butterfly die-Quikutz, cloud and rickrack dies-PTI, tiny butterfly-adapted from hydrangea die-MS, foam dots-Jody Morrow, pearls-Kaisercraft, brown wire-stash

July 19, 2010

Butterfly Twirl Pop-Up Card

Another Swap-Bot creation. This time the theme was pop-up butterfly cards. OK, so one pop-up card isn’t so hard but when I re-read the instructions, I had to make two pop-up cards for each of two partners! AHHH! I really didn’t want to design two cards around the same old type of pop-up because my stamps and punches are limited and I worried they’d be too much the same and boring! So I browsed SCS for another type of pop-up card rather than the typical ‘cut slit in paper’ type of card. And I came up with two! Spiral pop-up and twirl pop-up!

butterfly twirl front 
So here is the front, nothing terribly special but nice…

butterfly twirl inside1 
And here is the inside one way…

butterfly twirl inside2
You really have to check out the video on SCS to get the real niftiness of the spin feature. You set the tension of the cord just right and it makes the purple part spin! I changed the dimensions just a bit because my purple part stuck out when I closed it. I’m not sure if I messed up or if the directions were wrong but it worked fine after an adjustment. You can barely see it, at the base of the pieces that stick out, you can see that I have two score lines, the original and one that makes the sticking out protrude less.

I sure hope you will try one of these, so FUN! They would be PERFECT for kids! I’ll show you the spiral pop-up later in the week. I figured out how to make sure I keep up with blogging! Unless I am on a super tight deadline, I am blogging BEFORE I craft. That way, I can’t forget! :)

Enjoy, Rebecca

RECIPE
Stamps:
butterfly-handmade foam stamp from MS punch, verse-Verve Beautiful You, sentiment-Everyday Flexible Phrases SU!
Ink: pale plum, perfect plum-SU!
Paper: ivory, sage, pale plum, perfect plum CS, DP-SU!
Accessories: BBQ skewer-stash, brads (to cover ends of skewers)-MM, flower-Michaels, MS flower punch, Quickutz stamping foam for die cutting, pearl-Dollarama, Dazzling Diamonds glitter, silver cord-SU!, Corner Chomper-WRMK

December 01, 2009

Get Well Kit For Whimsical Wednesdays

Wow, the sketch this week is a doozy. I am not usually stumped by sketches but this one was tough with no real space designated for a focal image. In case you want to play, apparently the corner circles are buttons. Very interesting Nicky. This was a true challenge.

DDSC13

So I scrounged around my alterables drawer until I found this recipe box from Michael’s $1.50 bin (we don’t get $1 stuff as much here in Canada). I’d been planning to use it for a get well kit to give to someone sick as a little gift.

I chose a pack of paper I hadn’t used much, strangely, I later noted that it actually coordinated with the bit of patterned paper that showed inside the box. Perfect, I didn’t have to cover it up!

Now my use of the sketch is pretty loose. I turned sketch 90 degrees, then turned the strip with the ‘ladder’ markings so it was parallel to the long edge and used a strip of DP with a double ribbon bow. I’m afraid I couldn’t quite figure out what to do with the lines and asterisks so I skipped ‘em. I used pearls in place of the buttons.

get well1

get well2

Cute bow huh? I used the Bow Easy of course. To make it easier to keep the two ribbons together, I used a new ribbon adhesive from Joan’s Gardens. It is quite thin, nearly invisible and best of all, it doesn’t affect the flexibility of the ribbon. It looks much prettier IRL.

get well3

I added tissues, a Mr Noodle, a little Jell-O fruit cup and I will add throat lozenges, Vit C drops, tea and one of those medicated hot drink mixes. I think it would be a nice gift to get myself so I think it will go over well for one of my friends.


Come on, PLAY with us this week! I am off to check out last week’s entries as soon as I post this. I hope to see TONS of SUPER projects!! Please be sure to link up to the Whimsical Wednesdays blog! Sign up with Mr Linky with your DIRECT link to your gallery page or blog post. I’d love to know if anyone reading my blog plays so please so after Mr Linky, leave me a message, here or there. I’d be so excited if one of my readers plays! Visit all the other DareDevils (except Debbie) to see their FABULOUS work! I always look forward to seeing whatever they make. HAVE FUN!!

Enjoy, Rebecca

RECIPE
Paper:
DP, vanilla CS-SU!
Accessories: red line tape, thick glue dots-Thermo Web, Basic Grey chipboard, ivory paint, flowers-stash, Kaisercraft pearls, Copic (to colour pearls), sheer ivory ribbon-stash, celery ribbon-SU!, Quickutz alphabet

February 05, 2009

Parisian Embellished Purse Box

Isn't this pretty? I try not to toot my own horn too much but I am really happy with this purse box. This is the first Timeless Template I have used and I am entering it in the Paper Trey bag challenge. If you are interested, go to Paper Trey Ink and click on Packaging. You pay for them (ONLY $5 each!) and download them right away so no waiting for shipping. You get a file with the template and another with 5 ideas of how to use the template.
purse box main The base is made from cardstock; I covered the front and flap with designer paper. I went with the Ways To Use It Challenge from today to embellish the purse fastener. I believe the title was called Embellishment Pile-Up! Cute name huh?? The fastener is just a little cardstock tab you attach to the underside of the flap and slip into a slit in the front of the purse. My slit was a bit messy purse box closeup so I needed to cover it up anyway. I made the ribbon rosette and sewed on the buttons. The pretty pin from CTMH comes with the pink flower head only. I added the beads and the rhinestone from my stash. After adding the pretty pin, the back of the ribbon rosette was very uneven and the whole thing is quite heavy. I chose to sew the whole thing down to the cardstock. I used my 1/16" hole punch to create holes in the CS so the needle would pass through more easily.

You will notice a slight difference between the original photo and the close up. I finished taking the photos and realized I HADN'T STAMPED anything. {{ARGH!!}} Seriously, is that possible?? So I went back and added a tag on the pretty pin. Sorry it is so hard to see the handle; when taking close-ups, it is hard to get everything in focus. It has a small bead then a large bead then a small bead with a slight space between each on both sides just above the insertion into the purse flap.

Enjoy, Rebecca

OH, one other thing, be sure to visit Jessica at The Whimsical Butterfly - she has really yummy  BLOG CANDY! You have to make a card using Madelynn's Twinkling Tuesday Sketch 8 by Feb 10, 8am so get working. Be sure to check out the other rules on her blog.

RECIPE
Stamps:
love-retired SU!
Paper: pink pirouette, white, chocolate chip CS, Parisian Summer DSP
Ink: pretty in pink-SU!
Accessories: ribbon-Offray, round buttons-Basic Grey, flower button-SU!, thread-Mettler, pretty pin-CTMH, rhinestone-Zva Creative, pearls and beads-UK, crystal-Swarovski, tag die Quickutz, sterling silver split ring (to attach tag)-UK.

February 04, 2009

Love-ly Bling Rose Card

I haven't done a triple challenge card in a while! This one is for SCS Sketch Challenge SC213. Then I did the Stamp Simply No Time To Stamp weekly challenge SSNOTIME72 to make a love card. The last challenge was Creating With Chrissy Belli Challenge - Make a Cake CBC52. This was a really unique challenge; Chrissy gave us a lovely bling rose
list of cake ingredients and we were to choose 5. Then she listed each ingredient and either a technique or embellishment that corresponded. I choose flour, sugar, vanilla, eggs and chocolate. These corresponded to brads, designer paper, ribbon, scalloped punch/Nestabilities and buttons. I had a blast working these in.

Enjoy, Rebecca

RECIPE
Paper:
Basic Grey Gypsy pad, chocolate chip, pink pirouette, pretty in pink, white CS-SU!
Stamps: Wild Rose, Love-retired set
Ink: pretty in pink, pink pirouette, chocolate chip
Accessories: old olive, certainly celery markers, foam dots - SU!Basic Grey buttons and brad, tag die Quickutz, Nestabilities Label 1, Cuttlebug embossing folder, bling-Zva Creative
Techniques: two-step stamping, embossing, masking

January 01, 2009

So Sketchy French Postale

Can you believe it is 2009 already? Insane.  {{CUE MUSIC}}  525,600 minutes. How do you measure year in the life? (From 'Seasons of Love', play/movie Rent) I measure it with the ages of my children as do many other moms.  My baby will be 2 this year but not til May and I am in no hurry. The other one will be 8 in a month and a few days. EEEK! When did that happen? He is already asking {AHEM} grown up questions IYKWIM! Anyhoo...

This is the third and final card made with a So Sketchy Sketch at least for now. The DT requirements were 3 cards from their sketches and three others from your archives. I had fun making this card. It is an unusual style for me but instead of being hard it actually flowed! ****AMAZING****  Could it possibly be that I am growing as an artist? Way Cool!!
french postale I cut the damask floral paper first intending to use the other side. Then I realized I had cut it out so the flowers on it were sideways. What a ding-dong! {{{GRRRR}}} I hadn't even seriously considered the other side because I forgot it was double-sided and since I DETEST wasting paper and in fact liked it better, I flipped it. I didn't mind that these were sideways. At first I glued it on with the floral emblems at the bottom. Didn't like it that way considering the sketch I was using so I flipped it over. Did you notice the part where I said I had already glued it?? Honestly, if my head wasn't attached... so yes, that does mean that my card currently opens on the left. Maybe I'll give it to my BFF whose husband is Chinese (yes, it is girlie but he is an artist so he understands this stuff). Maybe he will appreciate it! Thank goodness I take photos of my cards closed!!

The paper is actually part of a postcard collection so that got me thinking about using the postmark stamps. I stamped the large stamp a second time on a scrap and cut out and foam dotted the circular portion. The little flowers were on my desk from another idea I was working on but decided against and they gently called my name just before I stuck down the circle. Normally I think of these things later and have to tear things up and re-stick them!

Enjoy, Rebecca

RECIPE
Paper: Bazzill CS lagoon, Making Memories PP, vanilla CS - SU!
Stamps: large postmark - ?Rubber Baby Buggy Bumpers, small postmark - ?SU!, Carte Postale
Ink: night of navy (distressing) and riding hod red - SU!, Adirondack black
Accessories: beige loopy ribbon and pearl - SU!, ivory ribbon - Masterstroke, flowers - Prima, foam dots, glue dots, Quickutz tag die