Showing posts with label not a card. Show all posts

July 12, 2017

Finally!

It’s been an amazing 6 months but sadly my term at SplitcoastStampers is over. Fun doesn’t even come close to describe my time with the Dirty Girls. The themes were so creative and allowed us so much free rein to come up with truly awesome creations! Now that my term is up, I am free to blog my cards!

SCS 01 bunny box wm

This box was absolutely one of my favourite creations. It seems anytime that I work with Maggie Holmes products from Crate Paper, I make something I REALLY love! The box was plain so I covered it with some 12x12 paper from the Bloom collection. Everything else except the ribbon, buttons, sequins and sentiment are from one Maggie H collection or another. Layering all of these beautiful embellies made me so happy! I can’t wait until a friend or family member has a baby so I can give a sweet little gift in there.

I will be coming back later in the week with some more cards and a book review (or two!). I have boys and they really aren’t into the crafts I do. But I’ve been contacted by a publisher and given some books to review for free. While I was given the books, I was not required to review them favourably or otherwise, and everything I write is my unbiased opinion.

Enjoy, Rebecca

September 02, 2016

Julie Nutting Doll Beachside Art Journal Page

Surely many people reading this blog also make cards. But do you also do art journaling? It’s so much fun and uses all the same supplies!

julie nutting summer page

You can make your own journal or just bind some pages together after you created enough for a book. I have two art journals I work in and another I swapped. The first two are hardbound, one with sketch weight paper and one with much sturdier paper. I use the study one for my final products and the sketch paper one for trials and experiments. The swap journal was one I made, decorated a two page spread in and then it was sent on it’s way to have pages done by people all over the world! It finally made it’s way back to me after over two years and I was thrilled with the art I received!

This particular page was done as a loose page swap (no book was mailed around the world) which ends up much cheaper in the long run and if a package goes missing, at least it’s only one page rather than a whole book. The theme was Julie Nutting summer. Well, as you probably know if you visit here regularly, I am IN LOVE with the BEACH! So I have lots and LOTS of fun supplies to use when making this page! It would take ages to list all the supplies so leave me a comment or email me if you’d like to know more about something specific.

Enjoy, Rebecca

October 19, 2015

Fall Mixed Media Canvas

Wow, it went from almost summery to SNOW in less than a week! Seriously? Gotta love southern Ontario ‘autumn’. So with a chill in the air, I made this super shabby fall decor piece for The Shabby Tea Room this week.

fall mixed media blessings

I started with a plain white canvas-covered board. I prefer the look of a wood frame canvas but boards are not only easier to work on but it was all I had in this size! I applied strips of music, text and scrapbook papers along with washi tape and lace with gel medium. Then I went over it all with a light coating of gesso. Next I added watercolour in long thin streaks.  Some overlapped the lace but most was on the canvas itself. For the foliage, I die cut plain ivory cardstock and coloured it in with gilder’s paste using both antique gold and patina which is the mint colour you also see on the canvas.

fall mixed media blessings2

The chevrons, which I added to help reflect the inspiration photo, were coloured with watercolour then covered in Crackle Accents. Next I went to town embellishing the canvas using Prima flowers, gold berry clusters, buttons, sequins and a big reclaimed sari silk bow. I found quite a few sequins that matched perfectly and I was happy to find I had brown buttons in the perfect sizes for the ‘dotted’ effect I was looking for. I thought they helped by bring in the dots from the inspiration photo.

fall mixed media blessings3

I really hadn’t planned to bring in the mint colour but I accidentally grabbed the patina (mint) colour of Gilder’s Paste before the antique gold one and I realized it brought a fresh pop to the autumn colours. So I added even more with the buttons! I die cut the ‘blessings’ letters in a more whimsical font but it didn’t work well so I tried this one. It’s way old, from Quickutz back when they had the Squeeze tool! Anyone been die cutting long enough to remember those? Ugh, I can’t tell you how many incomplete cuts I got with that thing; I have weak hands. I really like this font because its like a typewriter font but with some added whimsy. Last but no least I added a bit more texture using some brown ink and a script stamp.

ca TSTR 262a

I hope you like the inspiration photo and join us this week! Remember, our name is shabby, you project doesn’t have to be! We accept any type of project and any style! You know you waaaaaanna! But even if you only visit, be sure to leave the girls some love! We all thrive when we get great comments.

Enjoy, Rebecca

September 07, 2015

Shabby Muffin Tin

I LOVE the papers our sponsor for The Shabby Tea Room gave us this week! They are fabulous. Kuddos to Digital Papers by Janet!

shabby muffin tin 1

I looked at the page I had just printed out and I noticed they perfectly matched this muffin tin I thrifted and spray painted. Awesome! So I spent the better part of three days finding little odds and ends to add to this. I finished it with lots of sequins and rhinestones.

ca tstr 259a

I just love vintage cameras! Especially this type with the accordion sides.

shabby muffin tin 2

The camera circles and the tags are the digi papers. You can link to them directly from the links above my project on The Shabby Tea Room or the link above to Janet’s store. Other camera themed die cuts were found on a die cut pack by Maggie Holmes. I’m not sure which collection it’s from.

shabby muffin tin 3

Please let me know if you are wondering about a specific product. I’d be here all night if I tried to list everything. I hope you will play along with our challenge this week! I love cameras but you can also be inspired by wreaths, autumn colours or anything else you see in the photo! We love shabby projects but we accept any style! Be sure to visit the blog to see all the fabulous creations and leave the gals some LOVE!

Enjoy, Rebecca

March 29, 2015

Bird and Nest Bathroom Sign

I’ve been wanting to make a bathroom sign for a long time. We have two doors close together and even when we direct someone to the washroom, they aren’t sure which door to open.

bird sign

We had a nasty computer paper printed sign in the ugliest font ever since our annual BBQ last summer. I was so sick of looking at it! So I pulled out a plaque that hubby brought home from work. Ya know those ‘employee of the month’ type cheapie plaques?  Yep, one of those. It’s not real wood so I sanded it down enough to let gesso stick and covered it in 4 coats.

bird sign3

Then I covered part of it in the damask stencil using molding paste. I allowed that to dry then added white crackle paste in a fairly thick layer to the unstencilled areas. After that dried, I added the roses stencil over the crackle. So much glorious texture! (check out the area under the BATH letters in the above photo) Then I added some mists over top. I added a mist to the bottom too but I didn’t like the colour so I over coloured it in Copic airbrushing. That was much better, a warmer colour.

bird sign2

Next I started to work on the nest and branch. The nest was premade but I had to cut it in half first. Before cutting it, I applied some gel medium to the area where I planned to cut it. Not such a good idea. It didn’t dry completely clear so I had to colour it and cover it up with some raffia. What a pain! I’d recommend white glue if you ever need to do something similar. To make the branch, I used some wire covered in some sort of natural twine type stuff. I twisted 5 pieces together, shaped them and glued on the leaves and buds.

The bird was made from 5 layered ivory die cuts coloured with Copic airbrushing. I used a black rhinestone for the eye. I added 3 beads to the nest for eggs. Then last but not least, I added the copper Perfect Pearls, the letters and the rhinestone and ribbon bundle along with some bling. The rhinestone already had a loop on it and that’s how I tied on the ribbons. I really wish you could see this in person; it’s soooo much prettier! I’ll try to add some closeups later.

mmmc10

I made this for the Monthly Mixed Media Challenge. This month’s theme was Birds of a Feather. Click the graphic to visit the challenge.

Enjoy, Rebecca

June 15, 2014

Ocean Blog Hop

ocean blog hop

Welcome to my late entry for the Ocean Blog Hop. Between being being very busy and late with my blog post and the hostess missing my name so I wasn’t added to the original line up, I’m hoping I get at least a few comments!

photo1

I’m afraid my before photos are dismal. I took them in low light with my iPad and as cool as Apple devices are, their phones are not known for their low light amazingness. This is of course not all I received, some were already in their pieces and I received a larger quantity of some that didn’t fit in the photo. Of the two small green ones, some are round and some are faceted. They seem to be cultured sea glass, the round ones were between the freeform stick shaped beads and the faceted were packaged separately.

ocean blog hop necklace

This is a really hard necklace to capture in one shot with the equipment I have anyway. I used the items above plus some shell beads, amazonite, Swarovski crystals, freshwater pearls and some nifty chain.

ocean blog hop necklace side

What I couldn’t show you above in the supply photo were the pretty sea horse charms I used in the necklace. I also used to have Swarovski crystal starfish on the end of the dangle with the circle chain and multiple beads at the end but as I only had one, I took it off for now. The focal bead is from Unicorne Beads which I bought from ArtBeads.

ocean blog hop earrings

I’ve been wanting to try bead wrapping for a while so I thought I’d had a go of it. I’m semi-happy with it. I like the right far better than the left which was the first one I did. You get better the more you do right?

ocean blog hop bracelet

And now, my bracelet. Basic stringing and not that creative but I’ve never used spacer bars before so it was new for me. It wasn’t until after that I realized I had one more spacer bar and while I was making it, I’d been wishing I’d had another. But I’m never one to waste supplies and as I’d be wasting not just one strand of stringing wire but TWO, I just CAN’T restring it though I’m very tempted. I also wish it had more colour in it but I was determined to make one piece with nothing in it except the beads from the kit. I may add a charm though.

ocean blog hop tourmaline necklace

I did make one more piece using the bracelet from the kit but I have crappy photos and have since given away. I would have taken better pix before giving it away but I offered to make something for an Autism fundraising golf tournament silent auction without realizing it was 5 days away! By the time I got the reply and realized I had 3 days to make and deliver it, I was kind of in a rush. I packaged it without thinking and at the last second thought about pictures. Oops. It’s a shame I no longer own this lovely pendant but oh well. And I know it went to a good cause.

Since you can’t see it well, I’ll explain the beading pattern. Purple seed bead (PS), Green Tourmaline coins(GT), PS, tiny white Swarovski bicones PS, GT, PS. Then for the other grouping, it’s a green glass pearl with purple tourmaline coins then a bit larger white Swarovski bicones next to that. Thanks to everyone who made it this far. These alternate all along the length. I attached the pendant with a lobster clasp so it can be removed in the cooler months. It’s hard to see, but I made my own hook and eye clasp. It’s the first time I tried a clasp like this and I’m really proud. Click on any photo to see it better.

Thanks for reading this far and I hope you enjoyed my creations.

Rebecca

May 16, 2014

Blush Pearls and Hearts Bracelet

I’ve been making lots of jewelry lately but I’m a bit behind posting. This one tinkles a bit as I wear it and so reminds me of faeries!

pearls n hearts bracelet

It is made almost entirely of jump rings. So except for the pearls, it is all made of wire! The jump rings silver plate for the non-coloured ones and coloured aluminum for the pink ones. The pink is quite subtle so enlarge the pic by clicking on it if you’d like a better look. The little hearts are made from silver wire which I shaped then soldered closed. I also made my clasp, from the same wire I think. 18g silver.

Considering I’ve never made anything like it before, I am thrilled with it! I’m really new to anything made with jump rings, called chain maille, and new to soldering too. I am going to be selling these so let me know if you are interested! The jump rings and pearls come in lots of other colours too. And if hearts aren’t your thing, I can substitute your choice of charms. If you know jewelry, it’s a basic chain made of the silver rings with two pink rings in each silver one, one on each side.

Enjoy, Rebecca

All supplies available at Fire Mountain Beads or ArtBeads.

April 19, 2014

Baby Thank You Card Folder for Unscripted Sketches #253 and Giveaway Winner

I love using the sketch for something other than basic cards. This week I was making cards for a friend who just had a baby and the sketch worked beautifully a folder to hold the cards.

RebeccaEdnie253

I used some Webster’s Pages papers to make this. The yellow ribbon looks so pretty. I love that shade of yellow and the chevrons are awesome.

baby folder open

This is the inside of the folder. I designed it myself so if you like it and want the dimensions, let me know.

baby folder close

Here’s a closeup of the embellishments. The arrows are made from Craft-a-board then covered with white cardstock and washi tape.

baby folder matching card elephant ty

This is the card I designed. Sorry that it’s hard to read the tag; it says ‘thanks’. I made the card narrower than the usual 4.25”. It is only 4” which helped because I wanted to get the most from a scrap of 12” wide paper and of course, 4” fits across 3 times but 4.25 only fits twice. That also allowed me to hang the trunk off the edge and still fit into a regular envelope.

253

I hope you will join us at Unscripted Sketches this week. Be sure to check this week’s post to see if you won one of our prizes! I look forward to making the jewelry I am giving away. My winner is Monika Reeck so please email me in the next 48 hours to claim your prize.

Enjoy, Rebecca

RECIPE
Stamps:
Mega Mixed Messages, Bitty Baby Blessings-PTI
Ink: Harvest gold-PTI
Paper: lemon tart CS-PTI, Baja Breeze CS-SU!
Accessories: foam dots- The Sticky Stuff Store, Copic BG72, seam binding ribbon-Masterstroke Ribbon

February 09, 2014

Music and Roses Necklace

I’ve been making more and more jewelry lately but dang it is it hard to photograph with out some sort of stand! Especially necklaces. Earrings are pretty easy but not necklaces! I FINALLY got a stand so yeah! This one is my favourite because it goes with pretty much anything!

music and roses

This one is actually a little bit crafty! I added vintage music paper to the back of the Swarovski flat backed baroque pendant (not all are flat on the back) with Glue and Seal then sealed the sides and back with the same. You can see how the facets reflect the light in the picture. I finally managed to take a good sharp picture that shows sparkle! I was starting to wonder where my photography skills had gone!

I hope you like it!

Enjoy, Rebecca

Pendant, 6mm gold pearls-Swarovski, champagne rondelles-Znetshows, roses-local bead store, wire-bronze 24g artistic wire, bronze 6mm, 20g ID jump ring, 8mmlobster clasp

Technique Used: wire wrapped and linked beads (to learn try Fire Mountain Beads or Artbeads or YouTube), dont know that I’ve ever seen instructions for the gluing technique, email me if you’d like a further explanation

February 08, 2014

Rose Card for PTI Challenge

PTI had issued a challenge to make a 3x4 card such as you would use for Project life but in this case you can decorate it in any way you wish just like you would an ATC! Nichole is even setting up a way to trade them if you wish!

roses n gold for PTI 7th chlalenge 3x4 card

I have to make this quick as hubby just got home with the groceries so suffice it to say that except the gold spray, ribbon, pink and red ink and foam dots, everything is PTI. (The middle ink colour is melon berry.) The only thing about ink splatters I don’t like is dang it, I can’t control them. I am a bit of a control freak!!

I’m not going to trade this, so it will likely end up as a mini card, a place card or a tag. It is a nice size.

Enjoy the PTI 7th Anniversary Celebrations.

Rebecca

January 25, 2014

Pink and Gold Notebook for PTI Blog Hop

PTI blog hop logo

The theme this week is PINK! Yeah! I’ve been using a bit less pink as I’ve gravitated to more teal, aqua and turquoise. But my love of pink is still strong!

pink challenge PTI hop notebook

I used my love of gold (for me it’s not a trend, I’ve always preferred gold to silver) and the gold in the photo below to inspire my notebook.

untitled

Pretty isn’t it? I especially love the heart garland, I was going to use hearts, now I still wish I had. Anyway… The way it’s made is pretty obvious so I won’t bore you. Just one tip. If you don’t have enough ribbon to go around the notebook and then tie too, cut it, attach the ends near the front and back edges, then disguise the ends in some way. Use buttons, die cuts, chipboard cut outs, or in my case, a glitter strip, which is a premade product, to cover the ends.

pink challenge PTI hop notebook 2

Just a couple close-ups of the details I added. I cut these small flags by hand as I don’t have a flag die yet. The glitter in these strips is rock solid, absolutely none flakes off and it’s very thin and flexible. A wonderful product. The lace I used is a score from my local fabric chain store. so delicate and dainty I have to apply it with the tiniest line of glossy accents but it’s worth it.

pink challenge PTI hop notebook3

Another shot of this lovely lace and I promise, this text is much easier to see IRL. Not only do I need  better lighting but when I use natural lighting apparently I desperately need to find my lens hood. Ugh. When I bought my lens, I didn’t know what it did and I stashed it in my black hole of a basement. My stomach turns in knots when I think of having to find anything down there. And I really need a nice rose ink that’s darker than this one too.

Enjoy the hop! Hope to see you around here again some time!

Rebecca

RECIPE
Stamps:
Take Note-PTI
Ink: Rose shadow-Hero Arts
Paper: kraft CS-PTI, DP-MME Lavender
Accessories: circle dies-PTI, notebook-PTI, lace-FabricLand, glitter tape-Darice, foam tape-Jody Morrow

December 28, 2013

I made a ‘thing’ for Unscripted Sketches and some other challenges :)

Wow, my mind is really fried after having my hubby and kids home for a week and a bit. Holy moley! I made something and don’t know what to call it. It’s for Unscripted Sketches and also some other challenges (finally) so let’s just get on to business shall we?

RebeccaEdnie237

So I get it, at first glance this is a strange mix of things to put on a … well, it’s not a canvas. It’s not even a canvas board. It’s not really a painting either is it? It’s way, way too big to be a card at 7.25x8.25” (it was supposed to be 5x7 with 1/4” framing borders but it was just too small for the snowflakes so I added a 3” section). And now it’s too big for any standard frame! It’s too warped to just hang on the wall with a ribbon and too big for my SMASH album!
god is an artist 3

I started with the concept that I would be combining three challenges: The Shabby Tea Room-use snowflakes, silver/white and buttons/bells, obviously Unscripted Sketches and SSS Stamp and Show to use Tim Holtz products. I dragged out all the Tim Holtz stamps I own and was stumped. None of them are winter related at all. But, I have lots of inks and plenty of stamps that make nice background stamping plus plenty other stuff.

god is an artist 4

So I decided to drip TH inks artfully down a piece of watercolour paper. Hmmm, easier said than done. I chose a great big fat mop brush which would hold lots of paint right? Yep, I was right! However, it seems it didn’t want to release said paint onto the paper, grrr… Ok, second try, smaller fat brush would release the liquid, better but then too many lovely fat droplets ran all the way to the bottom of the page instead of artfully stopping with perfectly round balled ends right where I wanted them too stop. No wonder some artists get the big bucks. This stuff ain’t easy!

god is an artist 5

OK, so my page is dry, some artful drops have been stopped in the appropriate places, now what? So I fill in the space with some TH stamps. So far so good. Then I realized I’ve used butterflies. D’uh. Oh, well, I can cover them up! Up with what? Hmmm… Thus was the journey of the upper part of my… thing. I’ve seen some canvases end up nicer but look similar. The artist adds many items to the canvas disregarding the colour. Then gessos over the whole shebang, spray mists or paints it solid at first, then adding shadows, highlights and a few more embellishments. Tone on tone effect.

god is an artist 2

I had planned to add the snowflakes over the coloured drips at the bottom of the upper portion thinking it would create a great contrast, colour vs the silver but instead it just seems to cause competition for your eye and was too crowded. So I added a piece at the bottom and did the same thing with pewter Distress stain as I had done with Distress inks at the top. I started with full strength but it didn’t spread well so I went to a dilute version to help it move then back to full strength to add some deeper colour. I didn't have silver sequins so I took ivory ones, put a pin in the center and used a silver paint pen to colour them. I stroked outwards and slightly downwards from the center which also served to turn them as I coloured then just moved the pin which moved the sequin across my craft sheet so they could dry. Wash, rinse, repeat!
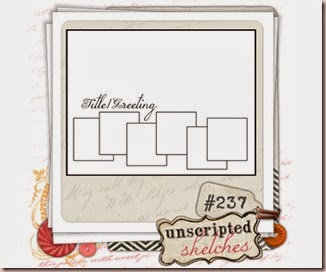
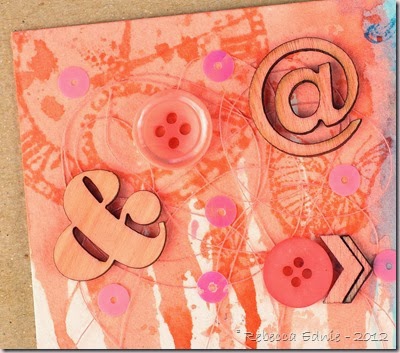
un sk237

When I saw the Artist sentiment I really wanted to use it but I knew it wouldn’t be read as a background stamp. And it didn’t make much sense by itself. But recently I saw a post on Digital Photography School about snowflake photography. The snowflakes looked like everything from typical snowflakes we see as stamps to satellites in space to glass platters to logos for computer companies to what’s inside a computer. Some were hexagons almost completely devoid of any other form. I know many don’t believe but for those of us who do, snowflakes are a pretty amazing and faith strengthening creation. So I realized this was a perfect way to use this sentiment after all. And it kind of ties in my art on top with God’s art on the bottom (his is way better!)

Sorry that was so long. I hope you will play with us this week at Unscripted Sketches. Hopefully you all had great weeks visiting with family and friends, you stayed safe and healthy, the busyness is over and you all have more time off to enjoy! So why not spend some time playing our sketch? The more the merrier!

Enjoy, Rebecca

RECIPE
Stamps:
Tim Holtz various, Mini Alpha-SU!
Ink: Archival black-Ranger, Worn Lipstick, Broken China Distress pad, Shabby Shutters Reinker, Spring Moss-PTI, Versamark
Paper: watercolour paper-stash
Accessories: Spellbinders, MFT snowflake dies, wood veneers, white Mr Hueys Mist-Studio Calico, Copic markers, hibiscus spring moss buttons-PTI, sewing thread-Mettler, Guttermann, rhinestone brad-American crafts, ivory (silver) sequins-Ellen Hutson, pink and blue sequins-FabricLand, green, pink sequins-SSS, blue star clips-Dollarama, silver EP-SU!, foam dots-Jody Morrow

December 26, 2013

Icicle Lights Jewellery Set

Wanna know what’s been keeping me so busy lately? Well yes, three kids but I’ve also been getting  into making jewellery. In the next few weeks, I will be showing you what I've been up to!

icicle lights for katie

This is one of my latest pieces. I made this for my autistic son’s respite worker. She’s leaving for three month’s to go to Australia and her work also asks her to bling it up since it’s a nice place so this works for both. It uses headpins (a silver wire with a flat end on it which acts as a stopper) which I strung Swarovski round and bicone crystals in blue, teal and white then turned a 3/4 loop with round nose pliers and slipped the loop over the chain.

Then I completed the loop and wrapped the wire tail around the wire stem just above the beads. I cut the chain to size, added a clasp to the chain and that’s it! The earrings are even easier. Add the beads to the headpin, wrap the loop. Add the earring wire. That’s it. It you are working with thicker wire than I am, you can just turn a loop and not even wrap it!

icicle lights for katie earrings

Planning the beads so they hang nicely, look good and keep them in order while making the was the harder than the construction. I wish I’d planned the second and third in from each end a little better as they don’t lay well. The other’s just don’t have support behind them in the photo to lay perfectly but the end ones just sit funny because they don’t have room. Oh well.

The earrings aren’t as interesting (I don’t like crazy earrings) but I did use a long French wire, (heck I don’t know what they are really called but that’s what I call em) so that makes them a bit more unique. When I asked our worker what style she likes or what preferences she has all I got was “I’m sure I’ll like anything you will make. Whatever you’d like to make.'” and “blue” so I think I’m good!

Enjoy Rebecca

RECIPE
any decent bead store has everything you see here. I used a basic jump ring and lobster claw closure. There are dozens of tutorials on line to teach you how to make wrapped loops and open and close jump rings, the only skills i used. Try Fire Mountain Beads and Artbeads

December 16, 2013

Snowflake Crocheted Bead Wreath Tag

I’m a bit bummed about the photo of the wreath on this tag; it’s so pretty IRL and so hard to see in the photo!

snowflake double embossing tag

I would have made the crocheted strand much longer so the final wreath would be thicker but I ran out of time. Maybe if the background was solid it may have stood out better, in fact I'm pretty sure it would have, my bad.

It’s actually really easy to make, you thread your beads on thin wire, 26 gauge or thinner. Keep your wire on the spool, don’t pre-cut it. Then just start chain crocheting it. Every so many stitches, you have to decide what look you want (one bead every stitch, every second, third…), you slide a bead along and stitch it in. Easy Peasy! I wrapped mine twice but I think I should have wrapped it at least 4 times to make it more dense and stand out from the background more.

snowflake double embossing tag2

For the background, I used Sharon Harnist’s double embossing technique. You can find her tutorial at the Classroom as part of the 12 tags of Christmas. I started by using glitter embossing powder but I overheated it so I embossed over it with clear embossing powder. Then I used two blues, one was more turquoise-ish, and E77 to airbrush the background. Removing the colour from the embossing was the fun part; it is quite dramatic!

I’m also going to enter this in the Really Reasonable Ribbon Challenge 62 to create anything!

Enjoy, Rebecca

RECIPE
Stamps:
Thanks All Ways-PTI (on back)
Ink: Teal Zeal-Memento (on back)
Paper: white CS-PTI, chocolate CS-SU!
Accessories: craft wire-Michaels, beads, lace, crochet hook-stash, metallic string, embossing folder-Cuttlebug, 1/2” hole punch-SU!, small hole punch-WRMK Cropadile, Hero Arts ultrafine embossing powder, iridescent ice embossing powder-SU!, Copic airbrush system

December 14, 2013

Door Sign for Unscripted Sketches #235

This week I took inspiration from an unconventional source. An item from a women’s steals site.

RebeccaEdnie235

The item I was inspired by was basically the same, a sign for your door with a turning upper layer that rotates to reveal several different signs which I should at SheSteals.com. There was one for your dishwasher, clean vs dirty, too. There are magnets on the back to hold it in place. I would have added some lade or ribbon or more layers of paper but I wanted it to be weather-proof in case I left it out and it started to rain or snow. What I have to really remember is to not leave it out too long with the ‘Come on in’ left showing!!

door sign b

I made it with die cut circles of craft-a-board and patterned paper with a brad and a flattened bead cap in the center. The flower is made from a Memory Box cherry blossom die which I stiffened with outdoor Mod Podge also applied to the rest of the project. Unfortunately, outdoor Mod Podge is sticky even when dried for a long time, I feature I HATE (I hear Martha Stewart decoupage medium is weather proof and not sticky but I didn’t have any) so inside I added two 1” circles of naked craft-a-board so the larger circles would rotate smoothly.

un sc sk235

There is still one more spot on the under layer for another little note but I couldn’t think of anything else. I can still add something if I want to later. I’ll probably have to add a piece of paper or use Staz-on or archival ink because I’ve sealed it but it could work. These are quick and easy to make; contact me if you’d like the exact measurements. It turned out that three messages underneath would fit perfectly so just email me for the circle and cut off dimensions!

We will still be having sketches all through the holidays so if you find yourself bored at all be sure to come on out and play. Do you sew? Quilt? Knit? Do Mixed Media? Paint? Doesn’t just have to be basic card making, paper crafts and scrapbooking though of course we love to see those crafts! We welcome anything you create! We’d even be happy to see baking that fits the sketch! Please play with our super talented team this week too at Unscripted Sketches!

Enjoy, Rebecca

RECIPE
Paper:
Authentique, Craft-a-board-Ellen Hutson, chocolate, peach (don’t know real name) CS-SU!
Ink: Teal Zeal-Memento
Stamps: really old alphabet stamps
Accessories: Memory Box cherry blossom die, bead cap, brad-stash, Mod Podge, Circle Nesties

November 23, 2013

Winter Pillow Box for Unscripted Sketches

I decided I am going to make an effort to make items other than cards for my Unscripted Sketches design team projects. I was looking through my alterables and the first thing I found was this pillow box.

RebeccaEdnie232

I ordered a few of these as possibilities for my sister’s wedding but they were way, way too big. I find it hard to judge sizes unless something is in front of me. Anyway, I swiped the edges with Versamark then added a mix of white and blue embossing powder and white glitter to the pillow and label. The blue snowflake has heat n stick powder and white glitter on it.

I do hope you will join us at Unscripted Sketches this week. You at least want to visit to see all the awesome projects made by the design team! They are really awesome this week (I think I am going to find myself saying that EVERY week; these girls are talented!) You can make any type of project you like; we welcome things other than cards like scrapbook pages, packaging, notebooks or journals, home dec like configurations, frames, wall art or boxes, sewing projects, mixed media, even ornaments! Or anything else you can think of!

Enjoy, Rebecca

RECIPE
Stamps:
SU!
Ink: baha-SU!
Paper: echo park, kraft pre-made box
Accessories: snowflake buttons (backs removed) Jesse James buttons, Snowflake dies-Spellbinders, ribbon, white, blue EP, Dazzling Diamonds glitter-SU!, foam dots-Jody Morrow

November 02, 2013

Home Sweet Home Pumpkin Mixed Media Canvas

Creating this was interesting on so many levels. I’m trying to enjoy fall more by decorating my house a bit. These aren’t colours that go with the little I have decorated but it’s still fun.

pumpkin mixed media canvas

I hate fall because it brings cold weather right after I’ve enjoyed summer so much and is a forerunner to winter with even more cold. But I really wanted to enter a couple challenges that this theme worked with. I experimented with a new medium, water soluble oil pastels. And I tried out some other new techniques like adding colour to my embossing paste and not the background.

pumpkin mixed media canvas2

So here’s how it’s made.

  1. add crumpled tissue paper to the background. I used one with birds, leaves and bird cages. Use gel medium underneath and on top of the tissue and allow some wrinkles to form.
  2. add gesso mixed with water over hte top. Create as much opacity as you like. I often add two layers to make sure I don’t get too much coverage the first time.
  3. This step is one I don’t know I’d use again but it was fun experimenting. Add dark brown oil pastel around the edges and over the edge, about 1”. add a lighter brown inside that. Buff with a rag and add gilder’s wax to the outside edge spreading some colour across  into the center of the canvas. (this didn’t end up showing in the end, I’ll explain as I go).
  4. add music paper to the bottom of the page with gel medium, colour with alcohol ink.
  5. add lace.
  6. Die cut ivy tendril and flourishes, sponge and stamp them
  7. cut sentiment from paper pack and add gold paint pen to edges in distressed (not perfect) way
  8. tear oval shapes from orange paper. I used a die to tear against so my shapes were torn but still smooth-ish on the edges. cut a stem. ink all edges and assemble adding a twine bow .
  9. add pumpkin and flourishes to canvas with gel medium. Use layers of scrap paper under upper portion of pumpkin to raise it to the height of the bottom portion which is over the lace. I didn’t make sure it met the edge of the lace.
  10. add embossing paste to top of canvas using a stencil. Allow to dry without using heat gun. I found when I used the heat gun, it brought the oil from the oil pastels to the surface and made it shiny. When I buffed it, quite a lot came off and I had to add back more colour. It never looked quite as good as it did in the beginning.
  11. when paste is dry, add green and brown ink. the good thing about the oil pastel background is it resists inking so the colour only sticks to the leaves. a nice bonus and something to think about when I use pastels next time.
  12. add sentiment using layers of scrap cardstock behind it instead of foam dots. not only was a worried about the foam dots sticking on the oily pastel background, it is more sturdy to use cardstock.
  13. add antique linen distress stickles to the pumpkin using a thin layer and to the heart in the sentiment using a thick layer. The moisture from the stickles and the uneven backing to the pumpkin allowed it to warp slightly which is a shabby look I quite like.

I’m entering this in the holiday SSS Wednesday blog challenge Anything Goes, the Mixed Media Colour Challenge to make a holiday themed project, the SSS Monday blog challenge Anything Goes and TSTR 190 to make a project using a pumpkin.

tstr _190

Happy Holidays MCC Badge

Enjoy, Rebecca

RECIPE
Stamps:
fancy flourishes-PTI
Ink: artichoke-PTI, Vintage photo Distress
Paper: Simple Stories
Accessories: Portfolio Oil Pastels, homemade embossing paste, Crafter’s workshop stencil, gilder’s paste-?, lace-stash, ivy die-Poppy, flourish dies, twine-PTI, Krylon paint pen, tissue-?, gel medium, gesso-Golden, canvas-Dollarama, nesties ovals (as tearing templates)