Showing posts with label Waltzing Mouse Stamps. Show all posts

July 05, 2015

My First Post for TSTR! Celebrate with Cake!

I am so excited to be part of the amazingly talented team who designs for The Shabby Tea Room! I love the photo we were given to work with this week!

tstr dt celebrate

I added some aqua and pink to help make the yellow pop! The chipboard pieces are from Maggie Holmes. Her products are shabby but modern at the same time. I don’t know how she does it!

ca tstr 255a

The cake was ivory before I Copic Airbrushed it. I overdid it a bit so I wiped most of the ink off with an alcohol-soaked cloth. I was very nervous that I was about to ruin my chipboard piece but it worked out really well. I also added the glitter to the cake plate. TIP! In case you were wondering, I carved out all but the top layer of paper on the cake plate on the left so it would overlap the balloon strings nicely. It is simple but go slow and easy so you don’t cut through the front layer of paper.

tstr de celebrate close

I also added some bling to the balloon. I started with embossing powder but either it doesn’t work well with chipboard or I overheated it slightly. It just looked a bit flat and icky. Have you ever overheated EP before? It gets an almost oily looking halo and flattens out. So that didn’t work out like I hoped :( To try and fix it I added some opaque glitter overtop. I didn’t have to cover the whole area, just some was enough. It matches well with the gold already on the balloon.

celebrate

Please join us at The Shabby Tea Room this week! I’d love to see some of my reader’s join along! We have a photo to inspire you each week so be sure to check back often. GO, visit now! See what the other gals have made for you! I am also entering this in the Curtain call-July1 Celebrate.

Enjoy, Rebecca

RECIPE
Stamps:
sentiment-Say It Loud WMS, triangle border-Sparkle and Shine-SSS
Ink: hibiscus burst, harvest gold, Hawaiian shores-PTI, Versamark
Paper: vanilla CS-SU! doily-Wilton
Accessories: chipboard-Crate Paper Maggie Holmes, EP-SU! Glitter-Art Institute, ribbon, gold glitter sticker paper (hearts)-stash, stencil-MFT, heart die-SSS, Copic Y21 and airbrush system

April 12, 2015

Vacation Island for Mojo Monday

I got some new Kaisercraft paper and it was so fun to play with it.

my island mojo

My mojo has been a bit low lately; I’ve been doing so much organization, it’s kind of sapped my creative energy. But as I worked on this, I just got more and more happy. I have to make a note to myself that anytime I’m not inspired I should go to this paper pad!

Mojo392

Click on the photo to visit the challenge.

To make the sun set background, I used Distress Markers. To make sure that the colours blended, I spritzed the stamp then dabbed off the area where the colours meet. Then I spritzed again. I love the effect! I stamped on the island using my MISTI to line everything up. It wasn’t perfect but it was user error. The MISTI placed the stamps exactly where I aligned them. I love this tool and it is totally worth the cost.

The card was sprayed with gold Glimmer mist when I was done and it looks great! Shame it doesn’t show up. I also added a few brushstrokes of Rock Candy Distress Crackle Paint. You can’t see it very well as the angle isn’t right and the cracks are very fine but it does add a bit more texture. The button was don a while ago so I don’t remember what I did too well but I remember adding Copic airbrushing to change the colour. Then the ink stayed tacky so I covered it with, I think, Glossy Accents. The finish ended up kinda cracked and textured which was really cool. The charm is covered in Sharpie paint pen to change it from silver to gold.

RECIPE
Stamps:
My Island-WMS
Ink: chocolate-PTI
Paper: kraft CS-PTI, DP-Kaisercraft
Accessories: shell ribbon-May Arts, shell charm-Fire Mountain Beads, button-PTI, gold and white thread, Copic Markers, faded jeans, broken china, marmalade Distress markers, Rock candy paint, Sharpie paint pen

June 17, 2013

Waltzing Mouse Stamps Blog Party–Summer Shells Box

WMS blog party logo]

This month’s challenge was Summertime Fun. Since I won a free set from some challenge back in October and I finally chose it (I had been waiting to order some stamps at the same time and get a deal on shipping, never happened… ), I had fun using My Island.

summer starts here box

I absolutely ADORE the beach and hot weather so this set and this challenge is so perfect for me! I wanted to do something more than just a card but I hate trying to decide what to do. As I looked around my craft room, this little box was just sitting there asking to be decorated!

summer starts here box2

I pulled out some favourite old MME papers which colours remind me of the beach and started covering the box and stamping.

summer starts here box3

I have a LOT of cool beach related items so choosing which to use was the hardest part! The shell trim has been waiting patiently for just the perfect project. It is too thick for a card and kind of big with the shells spaced too widely. But it looks amazing here dontcha think?

summer starts here box4

I used my new compressor and Copic markers to add colour to the coral and shell I had hanging around in my stash. They were both so boring before. That reminds me, have to turn it off and bleed the tank before I go to bed…

summer starts here box5

I used some very sheer gold ribbon to make a big bow using my bow easy. Then I distressed it using my heat tool. TIP: To get the bow to fluff up really well, instead of just wrapping the ribbon around and around the tool, pass it through the slit each time. You may need to scrunch your ribbon to make it all fit but that’s ok. If this means patterned, one-sided ribbon no longer shows the correct side up, just flip it in the middle! Works soooo much better than just wrapping it. The loops always separate correctly my way.

summer starts here box6

I am also entering this in Ribbon Carousel 82 Fun in the Sun.

ribbon carousel 82

I hope you enjoyed this post and if so, I’d love to hear from you. I treasure each and every comment. Ok, except for those weird spam ones… :) If you’d like to come back, maybe email updates would help? I have a subscription widget on my sidebar. I think my RSS feeder is ending soon and I don’t know how to replace it so if you do, I’d love to know how. Anyway, thanks for reading.

Enjoy, Rebecca

RECIPE
Stamps:
My Island-WMS, flourishes-PTI
Ink: moss, baja-SU! chocolate, kraft-PTI, frayed burlap Distress
Paper: DP-MME
Accessories: flourish die-PTI, foam dots-Jody Morrow, ribbon, loopy wired twine trim-May Arts

May 09, 2013

Flip Card for Waltzing Mouse Stamps Challenge

Waltzing Mouse Stamps has a challenge right now to make a moving or interactive card. I decided to make a shaped flip card.

Flip card WMS challenge

I used a partial die cutting technique to cut the flip portion of the card. And I modified the card to make the center portion narrower which allowed more to show through the opening when the card is closed. The part the thank you is stamped on. I did a trial using the paper sizes and score lines used the tutorial on Splitcoast Stampers and there wasn’t enough showing to stamp on or to look right. Which also meant making the overall card smaller to maintain an overall size of 4.25x5.5”.

Flip card WMS challenge2

Other than that, I just decorated the card as usual. I was a bit tricky to mat the front of the card with patterned paper. I wish I had added it before doing the die cutting but I managed.

Flip card WMS challenge3

When the card is closed you can’t see this flourish but I added it because you can see it from the back where I will put my message to the recipient.

Enjoy, Rebecca

March 04, 2013

WMS Oscar Dress Inspiration Challenge

Yep, I’m guilty of watching the Oscars even though I didn’t watch a single movie. I mean really, how many movies do you think I go to while breastfeeding a newborn last year?? LOL!

oscar insp wms

So that means my Oscar experience is all about the dresses! That made Claire’s challenge perfect! I was inspired by several dresses and the Oscars in general in making this card.

gloriar
It looks kind of purple here but I thought Gloria Reuben’s dress was navy so I used it was inspiration for the navy and other blues in the card and the floral motif made me think of using a fabric flower.

anneh

This dress worn by Anne Hathaway (click on her name for a pic with better colour)  inspired the pink in the horse and especially the pink flower.

cathz

Catherine Zeta-Jones' dress inspired all the gold on the card. The star, the gold on the carousel horse and the matting underneath, the stripe of mica flakes, the gold-embossed sentiment and the gold beads in the center of the flower.

oscar insp wms3

I also added a star, which of course look so much prettier IRL, to add to the theme of the Oscars. (its so reflective it looks misshapen but I swear, it isn’t!) Which is also why I used music paper when I cut the doily; the theme was Music of the Movies this year.

oscar insp wms4

I really wanted to colour the horse in brighter colours but the only bright pinks I have are the low RVs. As in RV00, 02, 04, 06 and I DETEST the latter two. The are pretty much fluorescent! Ewww! So I settled for softer colours but overall, I’m proud of the colouring. I added some music themed washi to the inside to acknowledge the music theme the Oscars had this year. I also used crystals inside the flower to mimic the bling of the Oscars, the glitz, glamour and diamonds! They are hard to see but look so nice!

oscar insp wms2

Claire, I hope you will accept my entry, I know my main image isn’t WMS but I only have three sets and two are sentiments! The other is Rescue Remedies!

Enjoy, Rebecca

RECIPE
Stamps:
horse-Flourishes, sentiment-WMS
Ink: Memento black, versamark
Paper: navy CS-Stash, white CS-XPress It, music DP-MME, gold CS-SU!
Accessories: star shaped red line tape, red line tape, foam dots-Jody Morrow, gold glitter-MS, gold druk beads-Fire Mountain Beads, other beads-stash, fabric-Fabricland, labels 1 Nesties, Sakura white gel pen, Copic Opaque white, leaf, washi tape, gold mica flakes-stash, PTI doily die, gold EP-SU!, Glossy Accents-Ranger

November 18, 2012

Thanks, You’ve Been Wonderful

WMS blog party logo]

This is a triple challenge post. For this month’s WMS blog party and this week’s WMS sketch challenge. And Friday Mashup #85 to make a Project Saying Thank You.

WMS thanks MME amazing

I’m afraid my photography is suffering today from the bright light in my craft room, not bright enough for no lights but bright enough to add a strange colour cast to the lights I do have. Grrr… In addition, I have a cold so I am a bit shaky so the focus is off. bummer. So sorry.

I have a die cutting trick for you. I always hoard my favourite sheets of DP. So I was loathe to cut into another sheet of this paper for the label. But in my mind, nothing else really suited. So I worked out exactly where I would place the final focal tag. Then I traced it. Since the larger mat would cover over the area below, I was free to ‘steal’ it for my label! Cool idea right? I had one small problem in that the card base showed through the holes in my die cut. This is only a problem with this ribbon treatment and not normally an issue. I solved it easily with a snippet of paper in a similar colour from the same pack! The spots are so tiny you definitely cannot tell.

WMSC124

It was awesome to find a paper that already had words in the corners a la the sketch! But not so overwhelming that I couldn’t add my own sentiment as the focal image. My sister and I finally agreed on the style of her wedding favours and this is the ribbon treatment and tag style we are using so I had them in mind when I made the card.

fri mashup 85

(Click the sketches to visit the blog posts.)

The favour is biscotti so they will be individually wrapped in bags intended for pretzels then wrapped in patterned paper. Then the tag will be added in a similar fashion but instead of tying the ribbon the way mine is above, the holes will be punched on the other sides and the ribbon will wrap around the biscotti and paper. The paper will probably have scalloped edges if I can figure out a way to do it that won’t take forever or require multiple punches due to dulling them because of so much use. 200+ favours is a lot! I’ll be sure to show you when I make them.

Thanks for visiting, if you like what you see, be sure you don’t miss anything by subscribing. Subscription thingies for RSS and email are on my sidebar!

Enjoy, Rebecca

RECIPE
Stamps:
sentiment-WMS, music-Skipping Stones Designs
Ink: Berry Sorbet, Chocolate-PTI, Antique Linen, Vintage Photo Distress
Paper: MME Be Amazing, kraft CS-SU!, melon berry CS-PTI
Accessories: pearls-Dollarama, foam dots-Jody Morrow, ribbon-SU!, label dies-PTI, flower-stash,

November 02, 2012

Belated WMS Sketch

Bummer, I missed posting and linking up to the WMS sketch by a few hours. I am always missing opportunities this way. UGH! I made this for my new next door neighbour. I don't know her to well yet but she seems nice!

welcome you

I actually won the papers I used from PC magazine. It is so fun to use stuff I've won! I paper pieced the door with a wood grain textured CS in the back. The heart die is by Memory box and is so pretty. I die cut it from the same paper as the tab but it was too pale so I sponged it with Berry Sorbet ink.

Enjoy, Rebecca

RECIPE
Stamps:
WMS Say It Loud, PTI Home Made
Ink: Hawaiian Shore, Berry Sorbet-PTI, Pink Pirouette-SU!, Antique Linen, Vintage Photo Distress
Paper: American Crafts-Neapolitan, kraft CS-SU!, textured white CS-stash
Accessories: Prima flower, memory box heart die, PTI tab die, button, twine, May Arts lace, scalloped edge punch-EK Success

September 28, 2012

Shabby Gift Bottle for WMS Sketch Challenge

I’d recently finished a bottle of supplements and noticed that , for once, I had a nice bottle with a nice metal lid without any weird colours or writing on it! Yeah, can you say embellishing opportunity! And then when I saw this week’s WMS sketch, I knew it would be perfect!

WMS sk shabby bottle

The sketch lent itself, I thought, to having a tag as the focal panel. I made the tiny little flower with a Cheery Lynn Cuties die, sorry, I don’t remember which one.

WMS sk shabby bottle2

I decided not to do any distressing because I don’t know the recipient very well. This is for my future brother-in-law’s mother! I know there are a few people out there who think distressing looks dirty and I wouldn’t want her to think I make junk! I think I’ll fill it with some chocolates to accompany the thank you card I’m making for having an engagement party for my sister. My family doesn’t know his family so it was the first opportunity for us to meet them all and his is a BIG family as he is one of 7 kids and they are all older with their own families!

WMS sk shabby bottle3

I am very pleased with the result. I love altering and decorating pretty found items and I feel so green doing so!

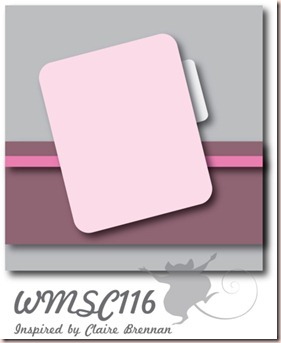
WMSC116

Click on the sketch to link to the challenge.

Enjoy, Rebecca

RECIPE
Stamp:
WMS
Ink: chocolate, banana-SU!
Paper: MME Follow your heart, vellum, kraft CS-PTI, white CS-Taylored Expressions
Accessories: cuties die-Cherry Lynn, leaf die-SU!, border die-PTI. mini scalloped edge punch-EK Success, twine-MME, foam dots-Jody Morrow, ribbon-Walmart, pearls-Dollarama, eyelet-WRMK, Copic marker

June 17, 2012

Celebrate–You’re a Star

WMS blog party logo]

I hope my son does well on his report card and if so, this is for him to celebrate the end of the year. This card is also for Unscripted Sketches 163, Joan’s Gardens challenge this week to make a card for a kid and this month’s Waltzing Mouse Blog Party which is open for linking right now!

celebrate WMS blog party june

I kinda got on the confetti craze for this card. I used lots of different papers from 3 packs and Say It Loud from Waltzing Mouse stamps. I wish I’d had one smaller star die so I could layer some even smaller stars pointing off the top right corner, I’ll have to go on a hunt to see which company makes just the right sizes. The photo below is the inspiration for this month’s blog party.

WMJune_Blog_Party

I’m noticing that I really strayed from the sketch quite a bit. I think you can still see the inspiration though, my large panel is bigger, the square was translated into a star and the right panel shrunk into my banner panel. I was still inspired by it though and that’s the point right? I hope…?

un scr sk 163

I hope if you enjoyed my card that you will visit again. I am in the process of making a video for a really cool graduation hat gift box/gift card box and I’ll post the link and measurements as soon as it is done. I have subscription thingies on my sidebar. Have fun with the rest of the party!

Enjoy, Rebecca

RECIPE
Stamps:
WMS
Ink: pumpkin pie, green galore, teal (the last two blended to get the small sentiment colour)-SU!, broken china distress
Paper: Fancy Pants, Echo Park-Splash, MME-Lime Twist, confetti white, kraft CS-SU!, orange zest CS-PTI
Accessories: star dies-Sizzix, PTI, star punch-Fiskars, foam dots- Jody Morrow, notebook page punch-SU!

June 07, 2012

Triple Challenge Pastel Get Well Card

I’m really happy with this pastel shabby chic get well card AND I managed to incorporate 3 challenges!

WMS pastel get well

I love this sketch. I much prefer asymmetrical designs; with symmetrical ones I always feel boxed in for some weird reason.

WMS pastel get well floral cluster closeup

I’m terrible for buying these gorgeous big flowers then hoarding them so I’m proud I used one. Silly huh? LOL! I used some tiny white flowers, silk ribbon and tiny die cut leaves to complete the cluster.

WMS pastel get well focal closeup

The stamping on the panel ended up being slightly lighter than I’d prefer but my other inks were too bright. I also didn’t account for how much the base colour of the paper would dull the colour or I might have tried a brighter ink. oh well, I like the soft look but it is a tiny bit hard to read if your eyesight is less than perfect. It is still visible though. I stamped too close to the edge of the paper so I had to cut it out by hand and then layer it on a die cut panel.

WMS pastel get well silk closeup

The fabric panel with the pearls is a leftover from a ring pillow my mom made for a friend. She stippled a larger panel then cut out what she needed. I got the leftovers! I sewed on individual pearls to accent the lovely silk fabric then distressed it with Antique Linen Distress ink.

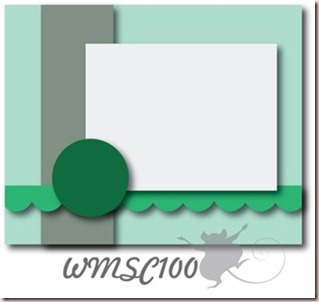
WMSC100_thumb2

I used the WMS sketch this week. They are celebrating 100 sketches and looking for Guest Designers. I’d love to be a Guest Designer so if you are reading this… pretty please! Did you know my needle case was mentioned as one of the top three projects from last month’s Blog Party. Yeah! (Click on sketch to visit the blog.) Did you notice I finally actually followed a sketch without changing it? I rotated it sure but I included all the elements and didn’t move any or rearrange any layers! WOW!

TSTR 117

I’m also entering this in the Shabby Tea Room challenge this week to use pink, aqua or teal and brown. As long as kraft counts as brown (and I’m sure it does), no problem! Click on graphic to visit blog.

CTD195

Click on the graphic to go to the blog. In case you can’t see it, I sponged the white flowers with apricot ink. It looks a bit too yellow but I promise, it is peach!

Enjoy, Rebecca

RECIPE
Stamps:
WMS
Ink: Soft Rose-Hero Arts, Antique Linen, Vintage Photo Distress inks, AL Distress Stain
Paper: kraft CS-SU!, Miss Caroline Fiddlesticks DP-My Mind’s Eye
Accessories: Labels 4 Nesties dies, vintage lace, silk ribbon-May Arts, mini flowers, pearl beads-stash, Rose creations leaf die, flower-Prima, Mettler sewing thread, silk fabric scraps, foam dots- Jody Morrow

May 24, 2012

Felt Needle Case for Waltzing Mouse Stamps Blog Party

WMS blog party logo]

ETA: I'm sorry the pics are so dark and yellow. I'd retake them but I already mailed it away. Believe it or not, I already lightened and colour corrected them, apparently just not enough. My apologies! I decided to think outside the box for this challenge. We are to use Felt or Cozy Fabrics as our theme. I made a needle case for a swap on Swap-Bot and it turned out perfect for this challenge!

felt needle case

The case is made of felt except for the front panel. You can just see the very tip of the ribbon I tied into a bow threaded through a hole in each page and tied in the back.

felt needle case side

Here you can see the layers I used to make the case.

felt needle case open

Onto each page I glued a different white lace. They look pretty right?

felt needle case back

Here you can see the bow that ties it all together. You can’t see the ribbon on the front because it is under the label. I hope you enjoy the rest of the blog party! If you like my project, I hope you will visit again. I have subscription thingies on my sidebar!

RECIPE
Stamp:
WMS, gingham background-PTI
Ink: Chocolate, pink pirhouette-SU!
Paper: white CS-SU!
Accessories: pink flowers-Prima, pearls, seam binding ribbon-stash, lace-WMS and stash, Nesties dies

May 17, 2012

Hostess Gift Set

I never used to bring a hostess gift when I was invited somewhere until I saw so many lovely gifts people posted on their blogs. I just wasn’t a custom when I grew up or at least not one I was aware of. I feel so grown up when I bring something with me. But now I don’t know, do I still send a thank you card when I give a hostess gift and card? Or do I save the card for after? Hmm.. if you know, please leave me a comment and fill me in!

hostess gift set

I covered a little can with DP and added a cute little handle. You can see the card I made too and behind is custom tissue paper to wrap the gift. I put a shower gel and purse-sized hand cleaner inside. I added Scor-Tape and glitter to the mini clothes pin to hold the card on to the can. I hate using envelopes when I am hand-delivering a card. Seems so wasteful!

hostess gift set2

Here is how it looks put together! I hope she likes it!

Enjoy, Rebecca

RECIPE
Stamps:
WMS Say It Loud
Ink: red-SU!
Paper: all SU!
Accessories: label die-Nesties, clothespin-Michaels, ribbon-SU!, tissue-Dollarama, glitter-MS