March 01, 2014

Big Adventure Card for Unscripted Sketches #246

The square panel on this week’s sketch reminded me of a buckle. Thinking of a buckle reminded me of some clips by Making Memories I’ve had for ages so I decided to finally use one on this card!

RebeccaEdnie246

Don’t you just love the faint mail pattern on this scalloped sticker? I trimmed the script washi tape down to a smaller width because I though it worked better here. I’m also entering this in Simon Says Stamp: Wednesday challenge to use Pearls and The Shabby Tea Room to use washi tape.

photo

Here you can see that I used Perfect Pearls on the background with a stencil. It is pretty hard to see but in the right light it looks shimmery. (it looks so different than the other pic because I took it with my iPhone.)

246

So what do you see when you look at this sketch? Check out what the design team gals saw by visiting Unscripted Sketches and then make a project and link it up! I look forward to seeing you there!

Enjoy, Rebecca

RECIPE
Ink:
frayed burlap distress ink
Paper: ocean tides CS-PTI, DP, sticker-Making Memories
Accessories: Perfect Pearls spray, clip-MM, washi tape-stash, pearls-Dollarama

February 25, 2014

Spring Flowers for PTI Blog Hop

Spring is in the air! Even here where we had sooo many winter storms, it’s finally getting a wee bit warmer. Yeah!

PTI blog hop logo

flower bouquet

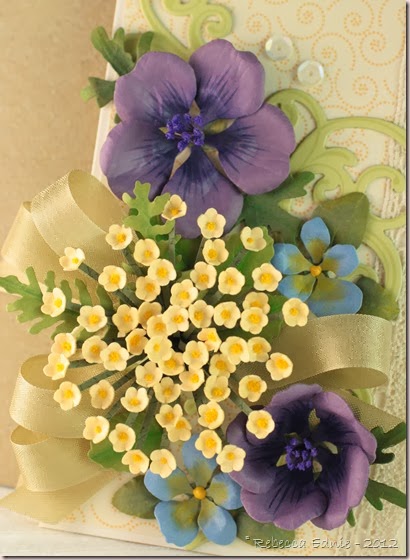
Yes, I made these flowers! I used Susan’s Garden Sizzix dies to cut all the petals and painstakingly shaped and coloured each one as well as 13 leaves.
flower bouquet2

I used Fancy Flourishes in the background as filler. But I didn’t like how the card showed through the yarrow so I added more leaves and some ribbon poufs. It isn’t a full bow under there, just some loops which is why I call them poufs!

flower bouquet3

Just some flower closeups. This one is an open hardy geranium. I used to grow these, they are so lovely! If you make these, add the pollen BEFORE rolling up the center. It’s so much harder later!

flower bouquet4

A semi-closed geranium. Made with the same petals, I just cupped it more in the center so the petals stood up. These flowers have airbrushed colour in the centers and lines drawn on with Copics. Susan recommends Pan Pastels for the centers and I can’t wait to get them but airbrushing looks just as good. It doesn’t work for adding lighter colours though so I use Pastel Pencils or my old SU! chalks for those.
flower bouquet5

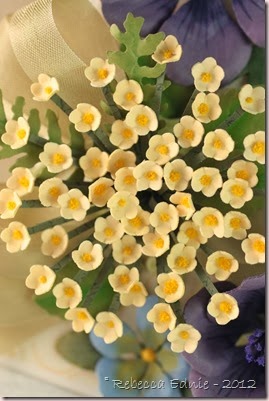
Yarrow. This one takes a while to make with all those tiny flowers. Each one has a center of pollen which I glue in with a Viva Paper Pen. I could use glue but since this has a very fine tip and is dimensional, it makes the centers look more realistic. You could use a dimensional glue but since most aren’t matte, it isn’t the best choice; if any shows through, it will look weird. I miss Matte Accents (sister to Glossy Accents) by Ranger. BRING IT BACK!!

flower bouquet6

See the yellow in the center and on the leaves? Definitely won’t work with Copics. This one is the violet. It comes in the same set as the Pansy and though I didn’t use it, I used some of the pansy leaves as filler. It’s the ruffled one in the top left corner.

I hope you enjoy the hop! Like my card? Please leave a comment or sign up for email or RSS updates! They are on the sidebar.

Enjoy, Rebecca

RECIPE
Stamps:
Fancy Flourishes-PTI
Ink: spring moss-PTI
Paper: Spring moss, cream CS, DP-PTI, olive, artichoke, banana, brocade CS-SU!
Accessories: sequins-Ellen Hutson, flourish dies-PTI, yarrow, geranium, pansy/violet dies, flower and leaf shaping mats-Sizzix, ribbon-Masterstroke, foam dots-Sticky Stuff Store, Copics and airbrushing system, Pastel Pencils-Conte, chalks-SU!, fine, medium and large embossing tools-unknown, pollen-Woodland Scenics, paper perfect pen-Viva Decor, lace-vintage

February 22, 2014

Shabby Baby Boy Card for Unscripted Sketches #245

I made a baby girl card last week so this week I had to balance it out and make a boy card! I wanted to play with The Shabby Tea Room challenge this week too so I merged the challenges.

RebeccaEdnie245

The papers are from Webster’s Pages, I deepened the aqua and blue paper with some blue ink because I wanted more contrast. I started with a yellow card base and inked both the base and yellow paper with Harvest Gold ink but the look was brighter than I wanted. So I saved that base and paper for another card and started again with an ivory base and inked both the paper and base with Frayed burlap ink. Ahh, much better.

welcome baby boy 2

For the Baby die cut, I layered and adhered 4 cardstock die cuts before adding the final patterned paper layer. It’s about 3/16” thick (between 1/8 and 1/4”) so about the same as if it was chipboard. I made the ribbon rosette by putting red line tape on a circle of scrap cardstock but it still overlapped in enough places that it didn’t want to stick everywhere. So I added a few staples between the layers just where it wouldn’t stick and one at the end  right under where the blocks ended up. I knew I was going to place something in the middle that would cover.

245

Wow, I finally made a card without changing the sketch much at all! I think the only think that is different is I rearranged the layers a bit. But that’s the awesome thing about Unscripted Sketches! You can do with it whatever you like! Follow it to the letter, change it, rotate it or flip it! It’s up to you! And remember, it’s not a card challenge blog, make whatever you like! I hope to see you there!

Photo inspiration _206

Enjoy, Rebecca

RECIPE
Stamps:
PTI
Ink: frayed burlap distress, night of navy, bashful blue-SU!
Paper: yellow, light blue DP-Webster's Pages, navy DP-American Crafts, ivory base, white scraps CS-PTI
Accessories: metal accent-Making Memories??, ribbon-May Arts, twine, tag die-PTI, baby die-Marianne, heart die-SSS, trim-vintage stash

February 15, 2014

Blingy Baby Love for Unscripted Sketches #244

This has to be one of the cards I’ve made that I’m most proud of lately. It suits my signature style of simple shabby (shabby without too many layers or embellies) and my favourite category of cards – baby!

love and bling baby card

No special techniques here to explain. I kinda enlarged one of the circles on the sketch and omitted one but I think you can still see the inspiration! I enlarged an angled view of the sentiment. I drives me nuts when I use lovely gold EP and it photographs really dark, even black!

love and bling baby card3

I hope you enjoy playing with this sketch like I did! It’s really fun when you realize that you don’t have to use each element as you see it. Change the shapes, sizes, proportions, flip; rotate, mirror, whatever you like!

love and bling baby card2

We’d love to have more people play our sketch so be sure to come by Unscripted Sketches this week!

244

Enjoy, Rebecca

RECIPE
Stamps:
Graphic 45
Paper: Graphic 45
Ink: Versamark, Vintage photo distress
Accessories: pearls-Recollections, oval die-Spellbinders, ribbon (chevron and silk to thread buttons)-May Arts, buttons-ebay, lace-stash, focal stickers-G45, foam dots-Jody Morrow, gold EP-SU!

February 09, 2014

Music and Roses Necklace

I’ve been making more and more jewelry lately but dang it is it hard to photograph with out some sort of stand! Especially necklaces. Earrings are pretty easy but not necklaces! I FINALLY got a stand so yeah! This one is my favourite because it goes with pretty much anything!

music and roses

This one is actually a little bit crafty! I added vintage music paper to the back of the Swarovski flat backed baroque pendant (not all are flat on the back) with Glue and Seal then sealed the sides and back with the same. You can see how the facets reflect the light in the picture. I finally managed to take a good sharp picture that shows sparkle! I was starting to wonder where my photography skills had gone!

I hope you like it!

Enjoy, Rebecca

Pendant, 6mm gold pearls-Swarovski, champagne rondelles-Znetshows, roses-local bead store, wire-bronze 24g artistic wire, bronze 6mm, 20g ID jump ring, 8mmlobster clasp

Technique Used: wire wrapped and linked beads (to learn try Fire Mountain Beads or Artbeads or YouTube), dont know that I’ve ever seen instructions for the gluing technique, email me if you’d like a further explanation