December 26, 2012

Papertrey Ink December Inspiration Blog Hop–Ivory Roses

PTI blog hop logo

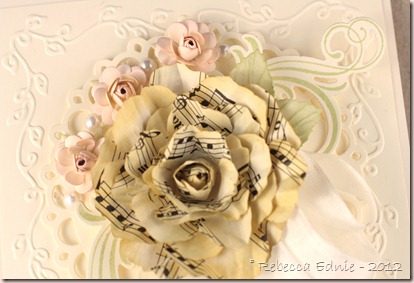
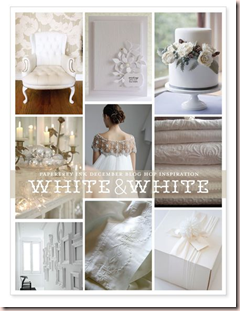
This month’s inspiration was to use white on white. A touch of colour or neutrals were permitted. I decided to go with ivory on ivory since the music paper I used as a base for my flower wasn’t was vintage and not white any more.

PTI dec 12 white on white

This was a very hard card to photograph. The top, further away and at a deeper angle to my lights turned out OK, but the bottom faded away to almost nothing. Ugh. On top of the ivory, I added a bit of yellow shading to the music rose, green to the leaves and flourishes and pink to the small roses. All flowers are handmade.

PTI dec 12 white on white2

I used a Cuttlebug folder for the embossing around the card to add dimension. Then I added more dimension with the picot circle die cut, flourishes foam dotted so they aren’t just popped up but are flat at one end, one layer foam dotted one third of the way down and double layered 2/3 of the way down so the end sticks up quite nicely.

When you can’t use colour for contrast, you have to look for other ways to get dimension. This card is over 1 and a half inches thick; maybe closer to 2”. It won’t even fit into a card box to be delivered. It will require hand delivery for sure! The sentiment says “Sending our Thoughts and Prayers”.

PTI white on white challenge 12 12

I am also going to enter this into the Shabby Tea Room Challenge to add a new card or your favourite of 2012. I have several favourites from 2012 but why not enter a new one?

I hope you enjoy the rest of the hop. If you liked my project I hope you will visit again and subscribe, the sign up thingies are on my sidebar. Thanks!

Enjoy, Rebecca

RECIPE
Stamps: JustRite-Sentiment, PTI-flourishes
Ink: Scattered straw, spun sugar Distress, moss-PTI, pink pirouette-SU!
Paper: ivory CS-PTI, vintage music paper
Accessories: circle, tag die-Spellbinders, flourish dies-PTI, large rose dies-Spellbinders, mini rose dies-Cheery Lynn, pearls-Dollarama, foam dots-Jody Morrow, Hug Snug seam binding ribbon

December 22, 2012

Beach Bum Babe for Dec SFYTT and Tuesday Trigger

I am so sad that this is the last SFYTT! However, I am thrilled that it seems I managed to play every single one all year! There can only be fewer than 60 people in the running for the prize because (I believe) that’s all who played in November!

beach bum SFYTT dec12

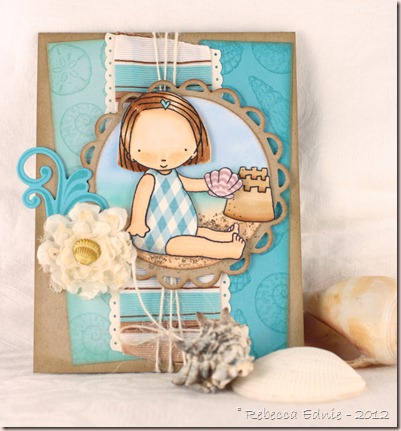
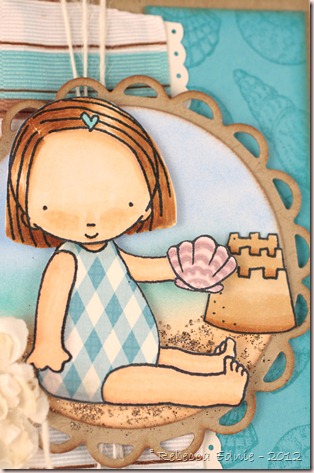
This also works for Tuesday Trigger on Moxie Fab World. I am very disappointed in the photo (again) because you can’t see the shading I added to her skin. I made it look like she has a bit of a sunburn. It is obvious IRL but like the pretty gold glitter I added to the sandy areas under and around here, you can’t see it! Bummer, I hate that! You can see it on her cheeks but it looks more like I just didn’t blend them well!

beach bum SFYTT dec12 1

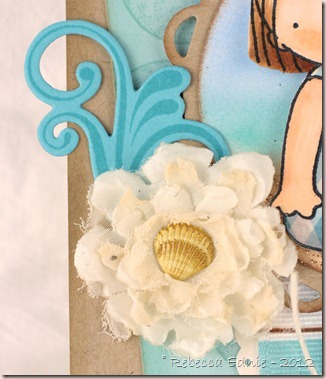
I made the flower using fabric from the bridal section of the store. You have to make sure you get polyester so that it melts properly and preferably a tight weave. I used two different kinds, I believe they were satin and georgette. Lots of different types of flower dies will work. I use a heat tool to melt mine, not a flame because you won’t have to worry about soot marks. I also use tweezers to support the petal as a melt it so I can’t melt it too much.

beach bum SFYTT dec12 2

As I sat and looked at my card, I regretted that I’d put the darker aqua panel on the right side, opposite the flower. I thought the flower would pop more against the darker panel. So I added the flourish to help it stand out more and I’m so glad it did! It’s the first time I’d used the flourishes with the matching dies and I was pretty happy with them. I don’t have many dies that need to be stamped after die cutting so I was please how easy it was to line up and stamp.

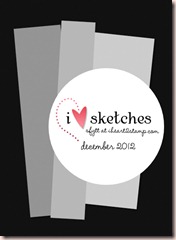
sfytt dec2012sketch

tues trig dec 18 12

Click on the pix above to visit the blog posts.

Here’s my link to all my SFYTT entries this year. http://eclecticendeavours.blogspot.ca/search/label/SFYTT

Enjoy, Rebecca

RECIPE
Stamps:
focal image-MFT, shells-SU!
Paper: all CS except white circle-PTI, white CS-X-Press It
Ink: Memento black, aqua mist, hawaiian shores-PTI
Accessories: fabric-Fabricland, brad-stash, glitter-Art Institute, foam dots-Jody Morrow, mini scalloped punch-EK Success, Nesties dies, PTI flourish die, twine, May Arts ribbon

December 16, 2012

Pretty Green Dress for The Shabby Tea Room

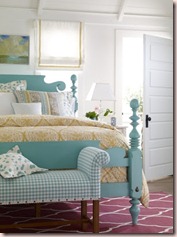
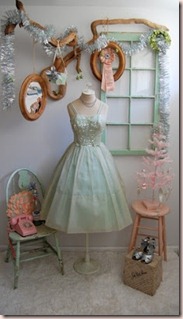
I LOVED this week’s inspiration photo! The colours were amazing, aqua, a slightly peachy pink, silver and a bit of brown which I didn’t really use much. I decided to recreate the dress and add some silver and pink accents.

green dress form tstr

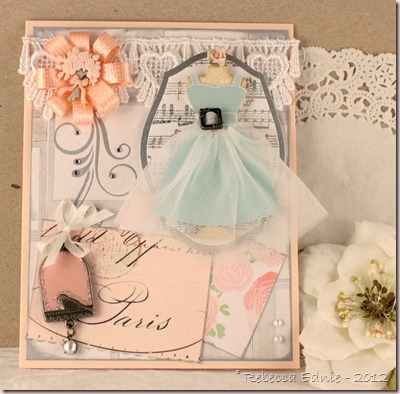
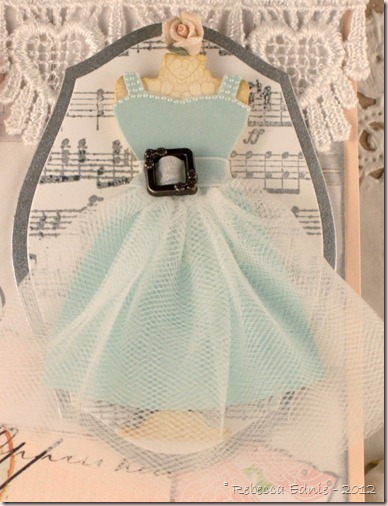
There are so many details that are hard to see and so much prettier IRL. The rose on the top of the dress form is clay and from some broken jewellery my mom gave me. It had a flaw on it so I covered the petal edges in glitter. No way to see the super fine glitter in the photo. You may be able to see in the  close up that I added the tiniest possible drops of Pearl Pen to the straps and neckline because to me the bodice looked beaded.

The belt ‘buckle’ has tiny flowers on it. The bodice has a vellum overlay to soften it and make it match better with the colour of the skirt with the tulle over it. The mannequin is covered in pretty tone-on-tone floral paper. The music stamped behind the mannequin has small areas which are embossed with silver glittered embossing powder which gives it a bit of vintage, distressed looking sparkle. I really wish you could see those things. They took me ages to add!

green dress form tstr2

The ribbon medallion, which is mimics the one in the inspiration photo, is much pinker IRL and not so orange. More like a deeper version of the Paris postcard colour on the lower part of the card. I tried manipulating my photo every which way but it either made it worse or seriously and disastrously affected the other colours. I didn’t really use the brown  much but there is a touch of it on the Paris postcard in the postmark which you can se below.
green dress form tstr3

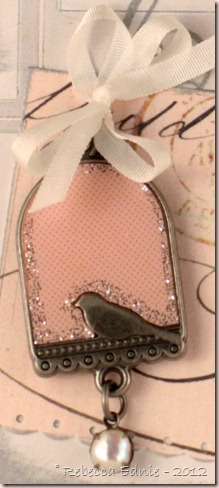
This gorgeous embellishment originally had a bright pink crystal dangling at the bottom which didn't suit at all so I swapped it out for a pearl bead. Ah, much better! Since I wasn’t hanging it from anywhere, I added a ribbon to the loop at the top. I love the subtle glitter they embedded in the epoxy when they made it.

tstr144

TMS _176

Click on either photo to visit the challenge blog posts. One other fun detail. I should have taken an angle shot because you can’t see it but the mannequin is several layers thick. She is made of pretty thick coaster board, 4 layers, so she stands out quite a bit from the background. You can tell a bit by looking at her shadow. much larger than it would be if she was flat or popped up on foam dots.

I’m also entering this in the Simon Says Stamp Challenge to use Your Favourites because this music stamp is one of my favourites. I lost it for a while and was THRILLED to have found it! YEAH!

Enjoy, Rebecca

RECIPE
Stamps:
music-SU!, flourish-PTI
Ink: Antique Linen, Encore silver
Paper: background dp-MME, roses-American Crafts, postcard-Cavalini, blush CS-SU!, coaster board-Ellen Hutson, silver paper, vellum-stash, aqua mist CS-PTI
Accessories: bird charm-Girl’s Paperie, medallion ribbon-American Crafts, white ribbon-May Arts, tulle-Michaels, pearls-Dollarama, rhinestones-TE, lace-Etsy, Tim Holtz mannequin dies, PTI label dies, SU! silver and iridescent ice EP, flower bouquet-Jesse James buttons, foam dots-Jody Morrow, pearl bead-stash, mini scalloped punch-EK Success, Pearl Pen, ribbon slide-stash, sheer white ribbon-stash, Glitter Ritz Warm Highlights

December 10, 2012

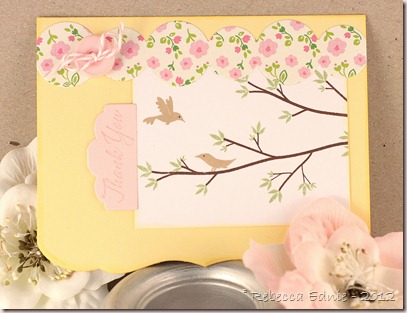
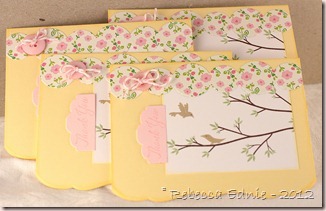
Two Little Birdies Thank You Cards

More birdie themed thank you cards for my sister. She doesn’t know it, but we are throwing her a Jack and Jill shower soon and she will need thank you notes for the gifts she will get.

sarahs birdie thank yous2

She will be surprised by the shower, if I manage to not blow it! I am not eager to tell her but I keep forgetting she doesn’t know! It was hard to find papers to coordinate with the bird and tree scene and not get too far away from things my sister likes. In all fairness, they really aren’t her style so I stopped making this type and started making some other ones. I’ll blog them soon. Since I’m making multiples, I’m going very CAS.

sarahs birdie thank yous

Hope she likes them!

Enjoy, Rebecca

RECIPE
Stamps: sentiment-SU!, tree-Out on a Limb Revised PTI, birds-CDS
Ink: celery, pretty in pink-SU!, chocolate, lemon, kraft-PTI
Paper: lemon tart, white CS-PTI, DP-Echo Park
Accessories: edge, circle strip, tab dies, button-PTI, Divine Twine

December 09, 2012

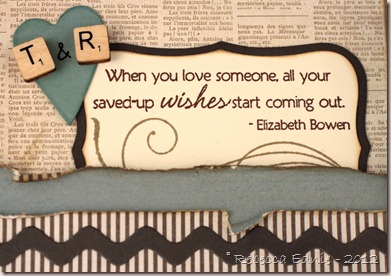
Happy 15th Anniversary Honey!

A couple weeks ago was my 15th anniversary! I was a bit late making an anniversary card for hubby, we aren’t that particular about the date anyhow.

TandR mojo ann card

Friends had us over for an anniversary dinner two weeks before the actual date, we went out for dinner and to see War Horse one week before the date and I was at a shower for my sister on the actual date. He gave me a card on the date so who was I to end the festivities by giving my card on time? I stretched everything out by giving him his card a week late! The actual date was November 15th but you could stretch it even further by leaving us congrats in the comments, pretty please!

TandR mojo ann card2

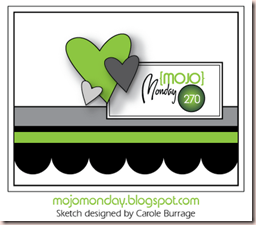
Back to the card. I used this week’s Mojo sketch which was a really nice one. Instead of three hearts, I added our initials to the heart. I think it’s ok to add hearts to a card for a guy if and only if it’s a love card. Some bloggers I follow add way too much girlie stuff to guy cards. For me, this is the absolute limit. There’s already scallops, a label shape, a flourish and rickrack for Pete’s sake! But there’s also serious stripes (strong colours, all the same size, none are little dots or dashes etc), distresses and torn edges, newsprint, non-girlie fonts and distressing. No bows, no glitter (unless it’s a winter card), no rhinestones, no ribbon unless it’s flat or tied in a knot,very sturdy and not frilly like grosgrain or corduroy. Ooh, or strips of suede or leather. Cool!

Mojo270Sketch

Enjoy, Rebecca

RECIPE
Stamps:
flourish-PTI, sentiment-PTI
Ink: frayed burlap, Antique Linen Distress, chocolate-PTI
Paper: smokey shadow, Ocean Tides CS-PTI, vanilla-stash, dp-MME
Accessories: Scrabble letters-, ampersand sticker-October Afternoon, rickrack, scallops die-PTI, heart die-Sizzix, labels 8 Nesties die

December 03, 2012

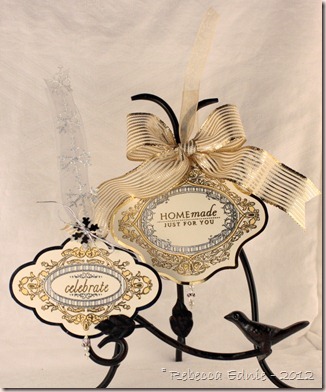
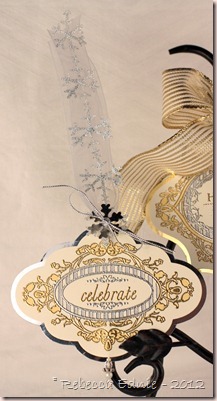
Blingy Gold and Silver Gift Tags

These are for a couple of challenges to make tags and use neutrals.

silver gold tags

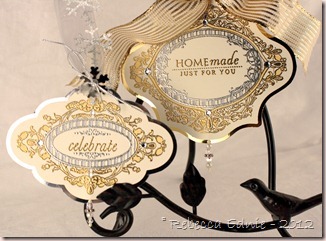
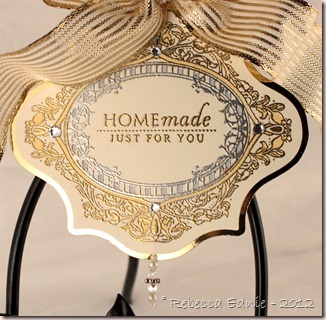
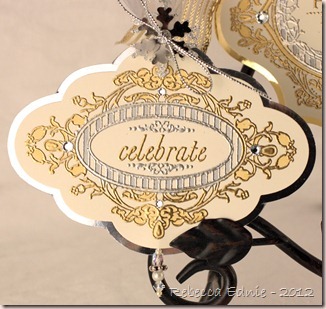
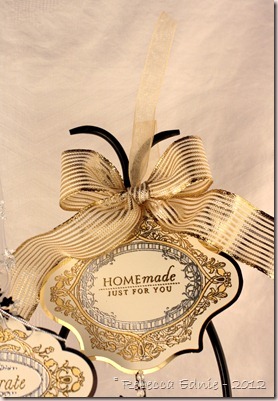
I embossed both of the medallion shapes with gold on the outer portions and silver on the inner portions. To do this, I gently poured on tiny amounts of silver EP then very quickly and carefully flipped my paper to get the powder off without getting any on the outer areas of embossing ink. Then pour gold EP on the rest of the image and heat. I was amazed how well it turned out. You can enlarge the pix below to get a better look.

silver gold tags6

If you noticed, the first picture didn’t have rhinestones, I added them and took another picture. But you couldn’t see the ribbon as well so I kept the first picture I took as well.

silver gold tags4

To enhance the effect of two colours of EP, I coloured some of the design in with Copic markers. I use C3 for the silver areas and Y23 for the gold areas. If you are careful to not touch the EP much, you won’t wreck your marker tip. The smaller tag is backed with silver mirrored cardstock and the larger with gold. Each has a small beaded head pin dangling from the bottom.

silver gold tags5

In the photo it is sandwiched between the layers of cardstock but I am considering pulling it out, making a loop at the top of the pin and attaching it with jump ring through a tiny hole in the bottom of the tag so it can swing freely.

silver gold tags2

I am entering this in the Joan’s Gardens Challenge make a tag. And Simon Says ‘Anything Goes’. I also can enter this in the December Paper Crafts Magazine Gallery Challenge to make a holiday project.

silver gold tags3

I am also entering this in the Shabby Tea Room to use the inspiration photo and use ribbon or twine and a sentiment. ETA: I am too late for TSTR. Bummer.

TSTR _142

Enjoy, Rebecca

RECIPE
Stamps:
JustRite, sentiments-PTI
Ink: Versamark
Paper: mirrored cardstock-Stamp Simply Ribbon Store, vanilla CS-SU!
Accessories: beads, head pins-stash, daisy spacers-Bead Diva, wide striped ribbon-stash, snowflake ribbon-May Arts, thin gold, wide silver ribbon-SU!, Nesties Label dies-Joan’s Gardens, rhinestones-Swarovski (I think), Copics, EP-SU!, metal snowflake-stash

Sweetly Pink Baby Girl Card

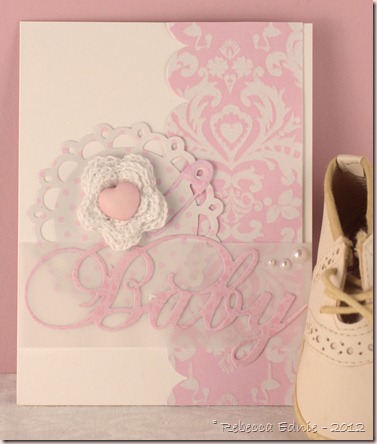
Could a baby girl card be more girly? It looks much nicer IRL; it was very hard to photograph and edit.

kaiserc baby die script

The swirly baby die cut is from Joan’s Gardens. To be honest, I forget which company makes it right now. My guess would be Marianne. The diaper pin comes with it. I don’t emboss my die cuts a lot but this one definitely benefits from the detail embossing adds. Again, much more obvious IRL. The triple layered flower is from my girlfriend, thanks Bec!

I am entering this in the Simon Says Stamp ‘anything goes’ challenge.

I wanted to layer the die cut over the pink paper but they were too similar and the word didn’t show up. So I tried layering pink vellum, one was too bright and one was the wrong shade. UGH. The white let too much of the pink show through. So I used two layers. I was careful to only use adhesive under the die cut and pearls to prevent the adhesive showing through.

Here’s an example of how bad my memory is. I made this card mid month for SFYTT. I just realised it now, Dec 1st! I internally gasped as I thought I had missed entering a card for November. I just checked and realized that I made another card for SFYTT for November! So not only did I forget I made this card and make another for the challenge, but I linked up that card and then forgot that just now as I am typing this! Seriously???? At least I still have a chance to finish out the year! But it ends early so if you are playing, be sure to get your card linked up by midnight Dec 24. So sad it will be the last SFYTT ever. Sad smile

Enjoy, Rebecca

RECIPE
Paper:
white CS-TE, DP-Kaisercraft, vellum-stash
Accessories: baby dies-Marianne (?), scallop die-PTI, pearls-Dollarama, circle die-Nestabilities, heart button-stash

December 01, 2012

Blue and White Snowflake Pillow Box

I signed up for emails from a new challenge, the Friday Mashup. They have a two part challenge. You can play one part or the other or combine them! I decided to go for both and combine that with making another project for my Swap-Bot challenge to use the stamp stamp multiple ways.

snowflake pillow box

Sorry for not folding the box ends together. Funny, I didn’t even think about it until I had taken the photo, mailed it and realized it looks weird in the photo! Since we all know what they look like, I know you can use your imagination! Silly me! It did help it sit up there to photograph it since it was flat.

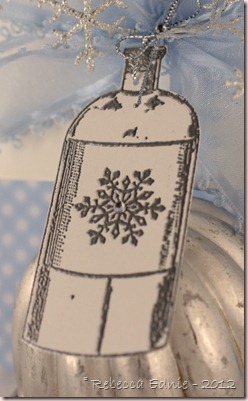
The little bottle is the same as the Vintage Parfum card, looks very different right? That was the point of that challenge, to use a stamp in lots of very different ways to get out of a rut of always using it in the same or similar ways. I thought it made a great tag. The box is great for gifts or gift cards.

snowflake pillow box2

It’s hard to see but the silver bow has a tiny rhinestone in the center and so does the snowflake on the bottle. Can you see the loops on the ribbon edges? It is formed from a looped cord attached to a tiny satin edge, so much classier than the old picoted ribbon I used to use in the late 80’s on country wreaths!

Ifri mash 87

Click on the photo to visit the challenge post. I’m also entering this in the Simon Says Stamp ‘Anything Goes’ Challenge.

Enjoy, Rebecca

RECIPE
Stamps:
Graphic 45 Olde Curiosity Shoppe
Ink: Versamark
Paper: white CS-SU!
Accessories: ribbon-stash, pillow box die-PTI, rhinstones-TE, cord-SU!, hole punch-Fiskars, snowflake ribbon-May Arts

Snowman Card with Gift Card Pocket

As soon as I saw this sketch, I thought of adding a gift card pocket to the front of the card. And I had paper that was perfect!

deconstr79 snow gift card

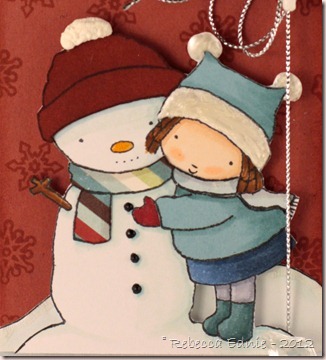
The snowflake is made from 5 or 6 layers of cardstock glued together. It makes for quite a nice sturdy embellishment! In the center is glued a perfectly matched rhinestone! I know red is an odd choice for a background for a snowy scene but it popped much better than any of the aquas or blues in the paper. Brown was out and so was pure white so red it was!

deconstr79 snow gift card2

Here you can see the inside of the pocket a bit. It is a simple folded cardstock piece with a small flap that folds up from the bottom to secure the card and it adhered on  one side only. Let me know if you’d like the pattern. I trimmed the pocket a bit so the cover closes well and rounded the inside left corner. It is stamped with snowy flourishes. The metal snowflake accents? They are bead caps I wasn’t using because they weren’t working with my jewellery style. Too pointy and big. But flattened out, they make perfect snowflake accents!

deconstr79 snow gift card3

I added a few fun textural touches to this little scene. Nuts, I just noticed that the silver cord is over the scarf and pompom on the hat. Oops! It just needs to be slipped back underneath! The snowman is sporting Liquid Applique on his hat and the little girl has Pearl Pen added to her hat. The hats, scarves and coat are paper pieced. The buttons are dotted with Enamel Accents to make them raised and shiny. The snowman nose and the hill behind the scene, which I hand drew, are accented with Crackle Effects to make them look like they are covered in cracked ice. Lastly, the scene and the paper piecing are coloured and shaded with Copics. Oh, and the colour of the snowman hat is deepened with Distress ink. I had so much fun coming up with ways to enhance this cute little scene!

deconsketch79-332x286

Click the sketch to visit the blog post. Since this layout comes up over and over, I’m making a note that will help me and maybe you too. If your card is 4.25 x 5.5” and you want 1/8” borders and spaces between the panels, each one needs to measure 4” x just under 1 1/4” wide.

I’m also entering this in the Simon Says Stamp Challenge  ‘Anything Goes’ and the Cute Card Thursday challenge 245 to use snowflakes.

Enjoy, Rebecca

RECIPE
Stamps:
girl-MFT, snowflakes-CTMH
Ink: Fired Brick, Antique Linen Distress, Memento black
Paper: DP-Echo Park, white CS-Taylored Expressions, Navy, red CS-SU!
Accessories: silver cord-SU!, foam dots-Jody Morrow, Copics and Multiliner, Crackle Effects, Enamel Accents-Ranger, cream Pearl Pen, rhinestone-stash, Liquid Applique