February 25, 2013

Monogrammed Notecard Set for Papertrey Ink Blog Hop

PTI blog hop logo

This month’s challenge was to create with monograms. Not something I do a lot of but isn’t that why they call it a ‘challenge’ and not an ‘easy’!? hee hee!

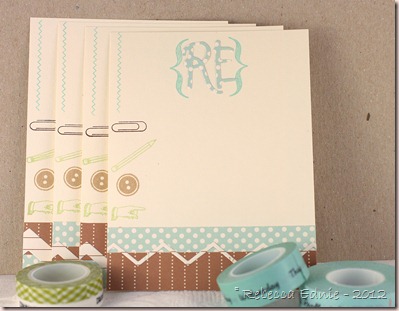
monogram notecards

I decided to make myself a pretty set of monogrammed notecards. I never have a decent thing to write a note on to the teacher despite having literally reams worth of GORGEOUS paper! Absolutely disgusting! So I was happy to finally have something nice to write on.

monogram notecards4a

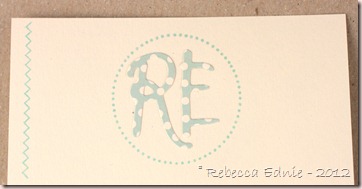
I plan to make a few more like these and a few more with just stamping and the monogram for when I need more space plus they will take less time to make. I may even stamp the monogram instead of die cutting it saving even more time. 4 was plenty for now considering I’ve just finished making 230 wedding favours for my sister’s wedding! Kinda sick of multiples for a while. I’m going to have a tutorial soon with tips on die cutting and stamping huge quantities of items! Stay tuned or check back if you are new to my blog.

monogram notecards3

Many of you may be new today so you don’t know me. But I am, in the words of Tim Gunn (Project Runway), a “make it work” type of person. So I rarely throw a card in the trash. An element or two maybe but even that is rare. So when a comedy of errors befell these cards, I made them work! First, my stupid cutter’s blade was dull so my papers had whiskers. So I trimmed them off with a scissors. Then I was adding the monograms and using a fine tipped bottle of glue. It virtually never clogs so I just kept adding more and more pressure to get the darn glue out until… you guessed it, a gigantic blob of glue landed on my notecard! Fortunately, it wasn’t the kind that sinks down into the paper so I used an adhesive eraser once it was dry!

monogram notecards2

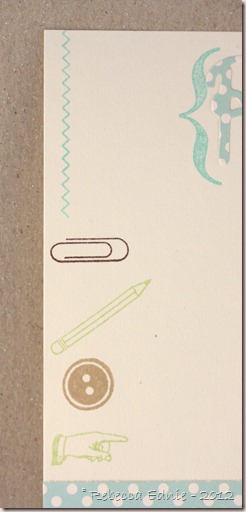
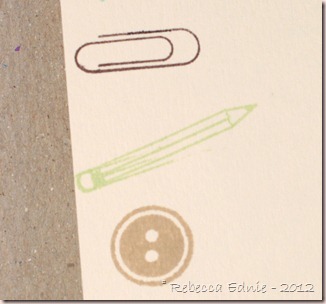
I laid out all my stamps along the left edge of the paper to arrange them. When the hand touched my acrylic block, the pencil too came for a ride even though I had moved it out of the way, just not far enough. I guess I inked the hand on the edge of the pad and didn’t ink the pencil so once I checked how it looked the first time, something I do when stamping multiples, especially with a stamp I’ve not used before, I went ahead and stamped the rest. I guess I hit the ink pad differently the other times because the pencil partially stamped and not in the colour or place I wanted it to. grrr… After saying bad things under my breath I tried stamping over. Nope, the lines were so thin, I couldn’t see them through my block and yes, it is clean! The solid end lined up.

So, is this worth trashing, especially when it’s the last step? IMHO, nope! Seriously, its a note to the teacher. Does she care if the pencil isn’t lined up? Nope! So think about that the next time something is headed for the round file! Does it matter that much? If it is headed to CHA, then yes, save the flubbed one for grandma and redo it but otherwise, take a deep breath and move on! I have to work very hard to not obsess and take myself too seriously! My kids need me and I can’t spend all day in my craft room redoing things and it isn’t healthy. So make it work ladies!

I hope you are enjoying the hop! If you like what you’ve seen or you don’t want to forget to come back for my assembly line die cutting and stamping tutorial or to see my wedding favours, be sure to subscribe by RSS or email subscription. They are both on my left sidebar. If you read this far, you are amazing and I thank you for visiting. Have a great day!

Enjoy, Rebecca

RECIPE
Stamps:
Button Boutique, Take Note-PTI
Ink: Aqua Mist, Spring Moss, Kraft, Chocolate
Paper: DP-PTI, ivory-cheap stuff
Accessories: chevron die-PTI, alpha die-Quickutz

February 22, 2013

Spa Party 2011

Yep, you read that correctly! 2011! I had a spa party for some of my girlfriends and I forgot to blog it! Crazy! I bought some of the stuff I needed and made others. Here are the things I made.

The invite…

spa party invite

Do you have any idea how long and hard I Had to look to find this You’re Invited stamp? OMW! I thought I was going to go crazy looking for it!

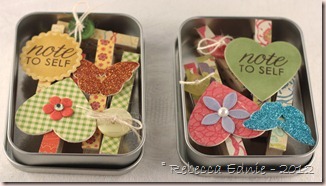
spa party clothespins4

Aren’t these cute? I didn’t have that many people so I tailored the designs to suit each person.

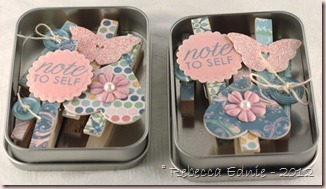
spa party clothespins2

Yep, two sets using these older papers. Nice for almost anyone. For a couple people whose favourite colours I didn’t know.

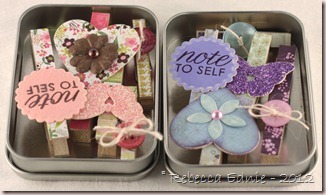
spa party clothespins3

These two were my favourites.

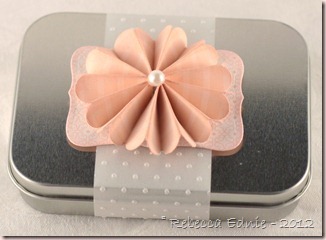
spa party clothespins5

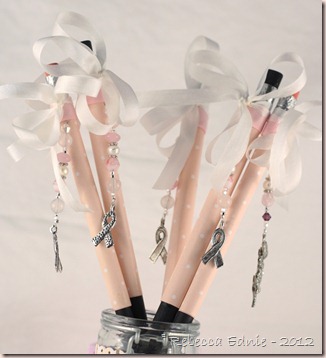
The outside of the tins were decorated with embossed vellum and a die cut topped by a medallion.spa party pencils

Everyone got a pretty beaded pencil too. Also in the bags were a mini lip gloss, a mani kit, a bath scrubbie, a hair band and a bracelet beading kit. I think there were a couple other things too but it was such a long time ago! I wish I had a picture of how I decorated the bags too!

We made the bracelet, did our nails and some of us put on a clay face mask while we watched movies. We ate all manner of goodies as I set up a candy bar, made an enchilada dinner and had cupcakes not only for dessert but also all afternoon. If you are really on the ball you will have figured out that I did all of this while 6 months pregnant!

It would take ages to write a recipe for this so if you have any questions, fee free to email me or leave a comment with your email.

Enjoy, Rebecca

February 17, 2013

Vintage Chalkboard Challenge Card

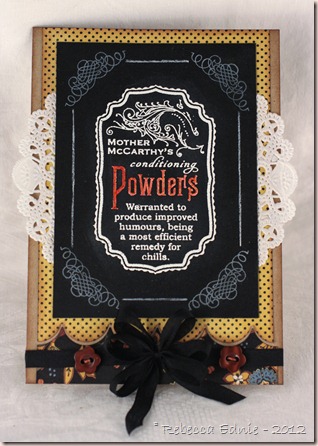
OK, so I have to admit, I’m not sure I like this card. I am so not a fan of black but I was dying to try the chalkboard technique.

chalkboard g45 card

But when I got done, I didn’t know what to pair it with! Uh oh! The black really threw me for a loop. So I went with some very bold G45 papers I bought only because I was making cards for a client and the elegant black patterned papers in the pack were perfect. Not my style really, well, at all and I hesitated to even publish it which is very unusual because I blog pretty much everything I make! I just had to blog it anyway because I it was for three challenges and even more so because I am thrilled with how the chalkboard technique turned out. I used a chalk pastel pencil for the lines. Not too many chalkboards have coloured ‘chalk’ but I have seen a few including a cool Nabob commercial.

This is for the Waltzing Mouse Blog Party to use Doilies. I just tucked bits under each edge. Also for Deconstructed Sketch 89 and Friday Mashup 97 to use Markers and add Texture. I used a marker to colour the white EP to match the DP and buttons. I fyou have any ideas what would go better with the black, leave me a comment!

deconstructed sketch89

Enjoy, Rebecca

RECIPE
Stamps:
WM
Ink: Versamark, white-PTI
Paper: kraft-PTI, DP-Graphic 45, black-SU!, doily-Wilton
Accessories: black ribbon-May Arts, buttons-SU!, scalloped border die-PTI, white EP-stash, Copics

February 14, 2013

Papertrey Ink Challenge–Pearl and Flower Necklace

PTI 6 ann

I’ve been getting more and more in to making jewellery lately so when Nichole challenged us to make some sort of accessory using PTI products, I decided to make a necklace.

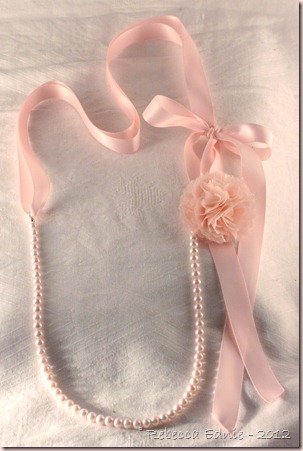
pink pearl flower necklace

I was inspired by a couple different necklaces on Pinterest but this is different enough and the overall idea common enough I can’t really credit any one source. I used a PTI scalloped circle die to make the flower. It took a metal shim and a thick cardstock shim to get good cuts but once I had it set, it cut beautifully!

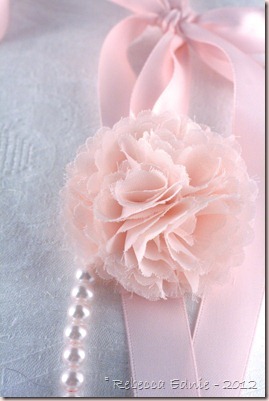
pink pearl flower necklace2

I am going to do a tutorial for the flower soon. I used ordinary 19 strand, stainless, coated beading wire for the pearls. At the ends I used Scrimp beads to secure a split ring. Scrimps are a large crimp bead with a tiny screw inside. They look nicer IMHO and hold securely. You can undo them unlike crimp beads to adjust the length by taking off some beads and redoing it. They also can’t break like a normal crimp which is a problem I often encounter. I guess I don’t know my own strength! Hee hee! I used a split ring instead of a jump ring (like a tiny key chain ring) because they are more secure. A soldered jump ring would also work.

The flower is made from chiffon, 16 pieces. It is pretty cheap to buy at the fabric store and they usually have lots of colour choices if they sell bridal fabric. I always get a small piece, like 6-10” or 1/8 yd but insist it is cut straight so I always get a ton more than I actually ask for. When cutting tiny things out of it, it adds up! On the back I glued on a pin back but also a lobster claw clasp. The lobster claw attaches to the split ring but the pin back allows me to take it off and use it as a brooch!

Enjoy, Rebecca

RECIPE
Glass based pearl beads-Michaels, split rings-BeadFx.com, stringing material-Beadalon, Scrimps, fabric-Fabricland, scalloped circle die-PTI, thread-Guttermann, ribbon-stash

February 11, 2013

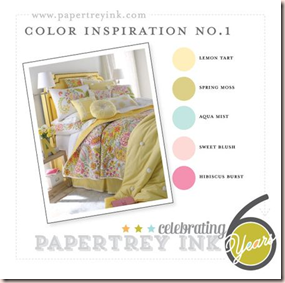
Papertrey Ink 6 Anniversary Challenge–Colour Inspiration–Shabby Roses

I loved this colour combination. Some of, well all of the colours are my favourites.

roses PTI6 colour chlg

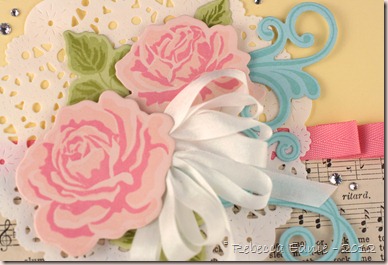
It took me a while to get used to stamping the layers of the rose correctly; took quite a bit of practice! But I got it. I recommend you start with the middle layer, add the accent layer then go back and stamp the solid image. In this case, I only used the last two layers using the die cut instead of the solid layer.

PTI 6 ann colour

Here's a close up of the floral cluster. I raised the smaller rose on one layer of foam dots and the large on on two layers.

roses PTI6 colour chlg2

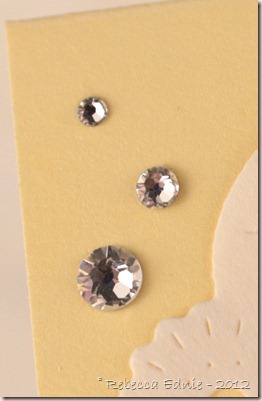
I have to tell you how much I am loving my new Swarovski crystals. They are SOOO sparkly. Ok, so you are thinking, “That’s great, but aren’t they way expensive?” Ok, to be fair they are more than regular crystals and you have to add your own adhesive but if you have a fine tipped glue bottle and a pick up stick of some sort, you will be fine. They aren’t that expensive; small ones are under $4.00 per package of 144 (depends on size). I ordered them from Fire Mountain Beads through Jet Beads.

roses PTI6 colour chlg3

Fire Mountain has quantity discounts that accumulate the more you spend. But what if you’d never order 200 items to qualify? You order through Jet Beads who have some sort of deal so you ALWAYS get the 200+ quantity discount! Cool huh? I just looked up to see how much they are and I realized that they don’t qualify for quantity discounts, the price stays the same. Though ordering them will help your cart total accumulate (this only matters if you order from Fire Mountain directly.) I had great service from Jet Beads; if you are worried, it isn’t a scam!

Enjoy, Rebecca

RECIPE
Stamps:
Flourishes, roses-PTI
Ink: pink pirouette-SU!, aqua mist, spring moss, hibiscus burst, simply chartreuse
Paper: spring moss, sweet blush, lemon tart CS-PTI, vintage typing paper (doily), vintage music paper-stash
Accessories: sweet life, flourish, edger dies, pink ribbon-PTI, foam dots-Jody Morrow, crystals-Swarovski, silk ribbon-May Arts

PTI Sketch Challenge–Masculine Get Well

PTI 6 ann

I have made cards for several of PTI’s challenges only to find that each challenge only runs for one day! Bummer! I was SURE that the Linky said there were 9 days to go but either I was wrong or they are closing it much earlier than that. Yeah, I guess I didn’t read the challenges themselves correctly. Ugh.

hex masc get well

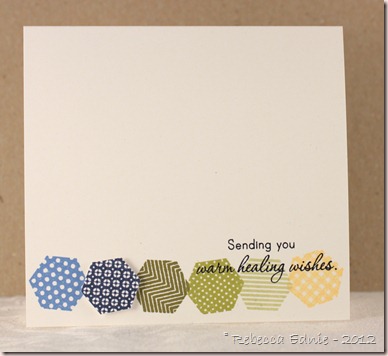
This one however, is on time! My hexagons were a bit too small for the sketch so naturally, I made the card smaller! It ended up WAY simpler than I normally like but guy cards are hard! I needed one for my FIL and didn’t have one (I made him another I’ll show you later) so it made sense to add to my stash.

PTI 6 ann sketch

I used harvest gold, moss, chartreuse, avocado, navy and blueberry sky. I cut out the navy one since stamping it on the die cut made it smaller than the others. And its pretty easy to cut out anyway. Click on the sketch to see the blog post.

Enjoy, Rebecca

RECIPE
Stamps:
Healing Touch Sentiments, Hexagons-PTI
Ink: see above, Archival black-Ranger
Paper: white CS
Accessories: foam dots-Jody Morrow

10 Minute Craft Dash–Hearts n Washi

craftdash_11

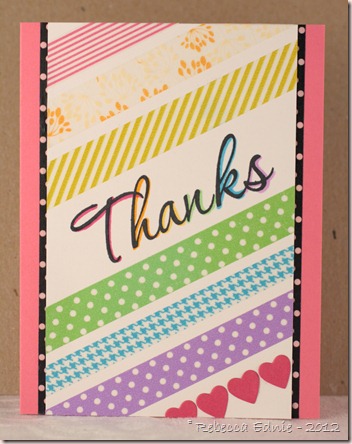
Make a card in under 10 minutes? WOW! But I had to try it. I went with a very easy layout and minimal stamping.

washi 10 dash thanks

I adhered my white CS to my grid mat first so I could easily line everything up without measuring. I started with the thanks and worked out each way from there. I started with the Thanks up too high so when I got to the bottom, I created a row of hearts. I had already planned on incorporating them but not this way. Even with a 10 minute card, plans can change in a second, LITERALLY!

I’m entering this in the Simon Says Stamp challenge to use hearts.

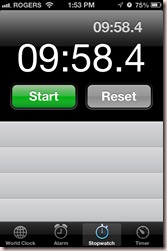
Need Proof? It was a close one!

washi 10 dash thanks clock

Enjoy, Rebecca

RECIPE
Stamps:
  PTI Thanks all Ways
Ink: Memento black
Paper: white, raspberry, hibiscus CS-PTI
Accessories: Heat die-PTI, dotted, striped washi-Queen and Co, other washi WRMK??, Copics

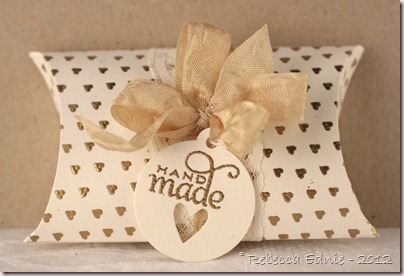
PTI Packaging Challenge–Gold Hearts Pillow Box

PTI 6 ann

This challenge was to be inspired by Pinterest and make some sort of packaging.

pin pack challenge

pin pack insp

Here’s my inspiration photo. Click on it to visit the source. This sweet little pillow box will hold the jewellery I’m making for my sister’s flower girl. The jewellery is gold with cream and gold pearls so I thought this was perfect!

The hearts were embossed with golf powder. If I make this again with this background stamp, I’ll align the pattern with the edge of the pillow box. It’s so simple, I think this is all I need to say!

I’m also entering this in the Simon Says Stamp challenge to use hearts.

Enjoy, Rebecca

Stamps: PTI
Ink: Versamark
Paper: ivory CS
Accessories: pillow box, tag dies-PTI, gold EP-SU!, lace, ribbon-stash, foam dots-Jody Morrow

February 10, 2013

PTI Year Of Flowers Challenge

PTI 6 ann

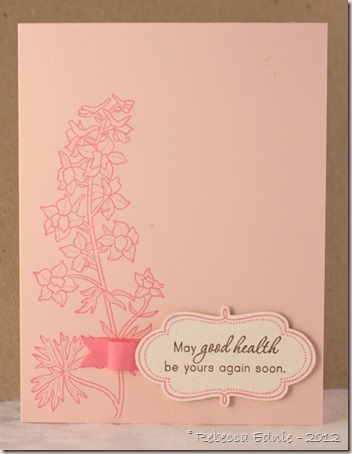
This challenge was to use one of the Year of Flower sets. Since I only have one, it was an easy choice!

year of flowers challenge

I CASEd a card by Dawn McVey for her sympathy card Make it Monday last year. It’s a very quick and easy card to copy which I need right now because I’m working on 260 wedding favours for my sister!

Enjoy, Rebecca

Stamps: flower, sentiment-PTI, frame-SU!
Ink: hibiscus burst, chocolate-PTI
Paper: sweet blush, natural white-PTI
Accessories: ribbon-PTI, foam dots-Jody Morrow

February 05, 2013

Interactive Card Zipper Card for PTI Challenge

PTI 6 ann

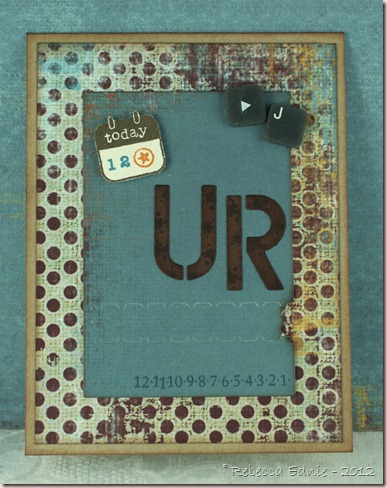
Nichole challenged us to make an interactive card in honour of their 6th anniversary. We were to be inspired by one of the team’s projects. Seeing Jessica’s fridge magnet with a photo of her son on it made me think of my son whose 12th birthday is today.  And I loved how Heather used die cut letters on one of her projects. While we don’t celebrate birthdays, this rather important milestone was on my mind. I guess the inspiration is a rather loose interpretation but still…

j is 12

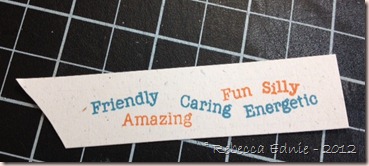
So I made this card for him. Inside it has the following words. Energetic Fun Silly Caring Friendly Amazing. I won’t give it to him for a while so it doesn’t seem like a b-day card. It isn’t easy to line up the stamping underneath the tear strip unless you plan ahead so I’ve got a tutorial below showing you how I do it. It isn’t too hard but I have a couple of tips.

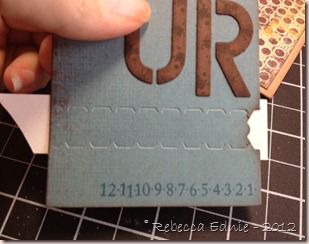
The grey keyboard keys are actually off a flexible keyboard. The kind you can roll up. My 5 yo tore it apart so I saved the keys for embellishments! At least something good came of it. The numbers at the bottom are from Boy Basics-Out of this World. I taped off most of the numbers so I count just ink some numbers individually and stamped the additional numbers to create an 11 and a 12.

So here’s how to line up whatever you hide beneath the tear strip.

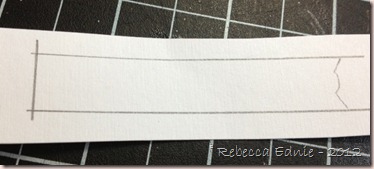
1. Die cut your tear strip die (aka zipper die) and choose a scrap to use underneath the tear strip. Using a pencil, draw two parallel lines just less than 1\2” apart. Using slightly less than the width of the tear strip will ensure your stamping doesn’t touch the edges of the zipper opening on the finished card since they won’t be smooth and straight. Place the paper with the lines on it under the die cut, line it up with the tear strip and trace the notched end. Slide the paper so your notched pencil line disappears slightly under the die cut. Trace the other side of the die. Again, by making your pencil marks slightly smaller than the die cut opening, you ensure you leave space where the zipper strip attaches in case the recipient doesn’t tear it off completely.

tear strip interactive card tut5

2. Stamp your choice of images or sentiments within the pencil lines. Then erase your pencil lines so you can barely see them. I didn’t trim the notched end now because it makes it hard to line up later.

tear strip interactive card tut2

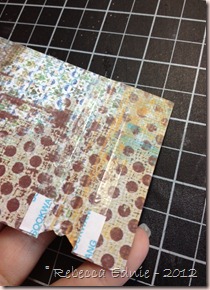
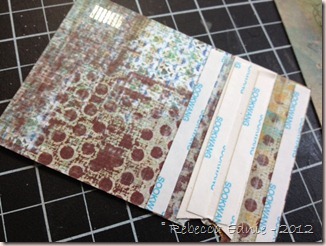
3. Add Scor-Tape or other strong adhesive to the back of the die cut close to the tear strip. As close as you can place it. Remove the backing except for the small portions shown.

tear strip interactive card tut1

4. Line up the stamped scrap using the faint pencil lines. Make sure no stamping shows from either end and you need to leave enough room to trim your notch.

tear strip interactive card tut3

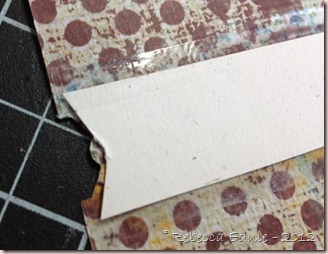
5. Trim off the straight side flush with the die cut and trim out the notched end while looking at the back. Because you left the backing on close to the notched end, it is easy to get your scissors in. When you are satisfied with the trimming, remove the last bits of backing. You could cut the notched end in advance but it would be hard to line up the scrap. If you wish to cut it ahead of time, I recommend you use a larger scrap and when you draw the lines, mark another where the bottom of the die cut would be so you can use that to line it up. (Next time I’ll be more careful and cut it smoother.)

tear strip interactive card tut4

6. Add more Scor-Tape. You want to be sure that tugging the strip doesn’t pull the die cut off the card! For the top portion, I just used my usual adhesive. Burnish the adhesive well. Apply to your card or project!

tear strip interactive card tut6

I hope this helps you line up your die cuts!

Enjoy, Rebecca

RECIPE
Stamps:
tag and words (inside) CTMH, countdown numbers, ink splotches-PTI
Ink: Walnut Stain, Vintage photo Distress, Teal Zeal-Memento, pumpkin pie-SU!
Paper: kraft, natural white, chocolate CS-PTI, DP-MME
Accessories: foam dots-Jody Morrow, stencil letter dies-Sizzix, interactive die-PTI,